ModSecurity是由 Trustwave 的 SpiderLabs 开发的用于 Apache、IIS 和 Nginx 的开源、跨平台 Web 应用程序防火墙 (WAF) 引擎,被称为WAF界的“瑞士军刀”。它是目前世界上使用最多的开源WAF产品,可谓是WAF界的鼻祖,很多其他WAF产品都或多或少受其影响,如OpenWAF等。
ModSecurity 可以通过检查Web服务接收到的数据,以及发送出去的数据来对网站进行安全防护,它具有强大的基于事件的编程语言能力,可提供针对 Web 应用程序的一系列攻击的保护,并允许 HTTP 流量监控、日志记录和实时分析。
在ModSecurity v3之前的版本中,Nginx的兼容性较差,这是因为在ModSecurity在设计之初是作为Apache HTTP服务的一个模块进行设计开发的,所以导致ModSecurity严重依赖于Apache HTTP服务。随着时间的推移,由于大众需求,该项目已经扩展到其他平台,包括Nginx 和 IIS等。为了满足对额外平台的支持不断增长的需求,需要删除该项目下的 Apache 依赖项,使其更加独立于平台。在ModSecurity v3版本中进行了重构,整个项目完全进行重写,去除了Apache HTTP的依赖,可以完美兼容Nginx。新的ModSecurity v3版本中,核心功能转移到了名为 Libmodsecurity 的独立组件中,通过连接器连接到 Nginx 和 Apache。接收 Web 流量并应用传统的 ModSecurity 处理。
项目地址:https://github.com/SpiderLabs/ModSecurity
规则集地址:https://github.com/coreruleset/coreruleset
ModSecurity中文社区:http://www.modsecurity.cn
Nginx连接器:https://github.com/SpiderLabs/ModSecurity-nginx
Apache连接器:https://github.com/SpiderLabs/ModSecurity-apache
注意:由于ModSecurity v3与Apache的连接器(ModSecurity-apache connector)目前仍处于测试阶段,因此如果生产环境的Web服务器为Apache,请勿使用ModSecurity v3版本,推荐使用ModSecurity v2.9.x版本。
[root@localhost ~]# yum -y install httpd mod_security mod_security_crs
在安装完成后,ModSecurity会在apache httpd的/etc/httpd目录下生成以下几个文件和目录。
/etc/httpd/conf.d/mod_security.conf 是ModSecurity的主配置文件,定义了ModSecurity引擎开关,日志存放位置等默认配置,详细的配置文件说明可以查看ModSecurity官网或者中文社区。
<IfModule mod_security2.c>
    # Default recommended configuration
    SecRuleEngine On					# 配置规则引擎是否开启,可选参数:On、Off、Detection Only;
    SecRequestBodyAccess On				# 配置是否由ModSecurity缓存和处理请求体;
    SecRule REQUEST_HEADERS:Content-Type "text/xml" \
         "id:'200000',phase:1,t:none,t:lowercase,pass,nolog,ctl:requestBodyProcessor=XML"
         								# 检查XML类型的请求体;
    SecRequestBodyLimit 13107200		# 配置ModSecurity允许带文件上传的最大请求体的缓存区大小,默认配置1G;
    SecRequestBodyNoFilesLimit 131072 	# 配置ModSecurity允许不带文件上传的最大请求体的缓存区大小,默认128K;
    SecRequestBodyInMemoryLimit 131072 	# 配置ModSecurity缓存在内存中的最大请求体的大小;
    SecRequestBodyLimitAction Reject	# 当请求超过SecRequestBodyLimit策略中配置的参数时的动作。 默认拒绝该请求;
    SecRule REQBODY_ERROR "!@eq 0" \
    "id:'200001', phase:2,t:none,log,deny,status:400,msg:'Failed to parse request body.',logdata:'%{reqbody_error_msg}',severity:2"
    SecRule MULTIPART_STRICT_ERROR "!@eq 0" \
    "id:'200002',phase:2,t:none,log,deny,status:400,msg:'Multipart request body \
    failed strict validation: \
    PE %{REQBODY_PROCESSOR_ERROR}, \
    BQ %{MULTIPART_BOUNDARY_QUOTED}, \
    BW %{MULTIPART_BOUNDARY_WHITESPACE}, \
    DB %{MULTIPART_DATA_BEFORE}, \
    DA %{MULTIPART_DATA_AFTER}, \
    HF %{MULTIPART_HEADER_FOLDING}, \
    LF %{MULTIPART_LF_LINE}, \
    SM %{MULTIPART_MISSING_SEMICOLON}, \
    IQ %{MULTIPART_INVALID_QUOTING}, \
    IP %{MULTIPART_INVALID_PART}, \
    IH %{MULTIPART_INVALID_HEADER_FOLDING}, \
    FL %{MULTIPART_FILE_LIMIT_EXCEEDED}'"

    SecRule MULTIPART_UNMATCHED_BOUNDARY "!@eq 0" \
    "id:'200003',phase:2,t:none,log,deny,status:44,msg:'Multipart parser detected a possible unmatched boundary.'"

    SecPcreMatchLimit 1000
    SecPcreMatchLimitRecursion 1000

    SecRule TX:/^MSC_/ "!@streq 0" \
            "id:'200004',phase:2,t:none,deny,msg:'ModSecurity internal error flagged: %{MATCHED_VAR_NAME}'"

    SecResponseBodyAccess Off
    SecDebugLog /var/log/httpd/modsec_debug.log
    SecDebugLogLevel 0
    SecAuditEngine RelevantOnly
    SecAuditLogRelevantStatus "^(?:5|4(?!04))"
    SecAuditLogParts ABIJDEFHZ
    SecAuditLogType Serial
    SecAuditLog /var/log/httpd/modsec_audit.log
    SecArgumentSeparator &
    SecCookieFormat 0
    SecTmpDir /var/lib/mod_security
    SecDataDir /var/lib/mod_security

    # ModSecurity Core Rules Set and Local configuration
        IncludeOptional modsecurity.d/*.conf
        IncludeOptional modsecurity.d/activated_rules/*.conf
        IncludeOptional modsecurity.d/local_rules/*.conf

</IfModule>
modsecurity.d 这个目录下是CRS策略文件,但是这些文件基本上都是软连接,文件的真实存放目录是/usr/share/mod_modsecurity_crs/rules。
[root@localhost httpd]# cd modsecurity.d/
[root@localhost modsecurity.d]# ls
activated_rules  crs-setup.conf  local_rules
[root@localhost modsecurity.d]# ls activated_rules/
crawlers-user-agents.data                        REQUEST-931-APPLICATION-ATTACK-RFI.conf
iis-errors.data                                  REQUEST-932-APPLICATION-ATTACK-RCE.conf
java-classes.data                                REQUEST-933-APPLICATION-ATTACK-PHP.conf
java-code-leakages.data                          REQUEST-934-APPLICATION-ATTACK-NODEJS.conf
java-errors.data                                 REQUEST-941-APPLICATION-ATTACK-XSS.conf
lfi-os-files.data                                REQUEST-942-APPLICATION-ATTACK-SQLI.conf
php-config-directives.data                       REQUEST-943-APPLICATION-ATTACK-SESSION-FIXATION.conf
php-errors.data                                  REQUEST-944-APPLICATION-ATTACK-JAVA.conf
php-function-names-933150.data                   REQUEST-949-BLOCKING-EVALUATION.conf
php-function-names-933151.data                   RESPONSE-950-DATA-LEAKAGES.conf
php-variables.data                               RESPONSE-951-DATA-LEAKAGES-SQL.conf
REQUEST-900-EXCLUSION-RULES-BEFORE-CRS.conf      RESPONSE-952-DATA-LEAKAGES-JAVA.conf
REQUEST-901-INITIALIZATION.conf                  RESPONSE-953-DATA-LEAKAGES-PHP.conf
REQUEST-903.9001-DRUPAL-EXCLUSION-RULES.conf     RESPONSE-954-DATA-LEAKAGES-IIS.conf
REQUEST-903.9002-WORDPRESS-EXCLUSION-RULES.conf  RESPONSE-959-BLOCKING-EVALUATION.conf
REQUEST-903.9003-NEXTCLOUD-EXCLUSION-RULES.conf  RESPONSE-980-CORRELATION.conf
REQUEST-903.9004-DOKUWIKI-EXCLUSION-RULES.conf   RESPONSE-999-EXCLUSION-RULES-AFTER-CRS.conf
REQUEST-903.9005-CPANEL-EXCLUSION-RULES.conf     restricted-files.data
REQUEST-903.9006-XENFORO-EXCLUSION-RULES.conf    restricted-upload.data
REQUEST-905-COMMON-EXCEPTIONS.conf               scanners-headers.data
REQUEST-910-IP-REPUTATION.conf                   scanners-urls.data
REQUEST-911-METHOD-ENFORCEMENT.conf              scanners-user-agents.data
REQUEST-912-DOS-PROTECTION.conf                  scripting-user-agents.data
REQUEST-913-SCANNER-DETECTION.conf               sql-errors.data
REQUEST-920-PROTOCOL-ENFORCEMENT.conf            unix-shell.data
REQUEST-921-PROTOCOL-ATTACK.conf                 windows-powershell-commands.data
REQUEST-930-APPLICATION-ATTACK-LFI.conf
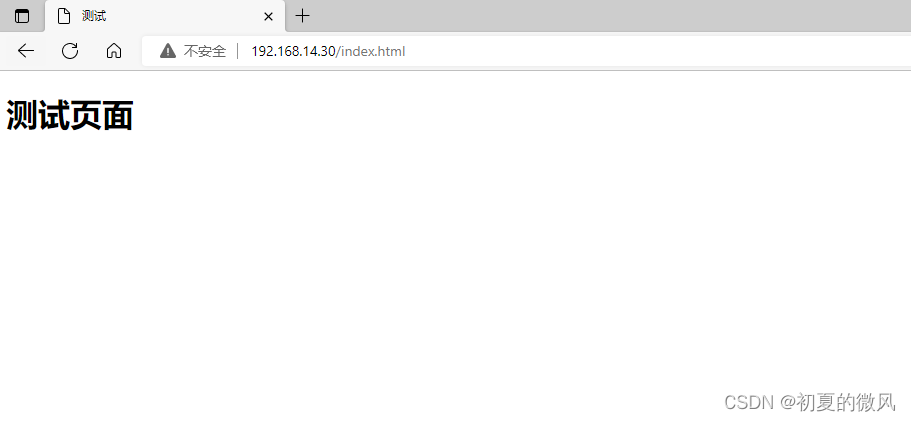
在ModSecurity和Mod_Security_Crs安装好后,默认开启全局生效,无需另外配置。
没有添加脚本执行参数的情况下可以正常访问。
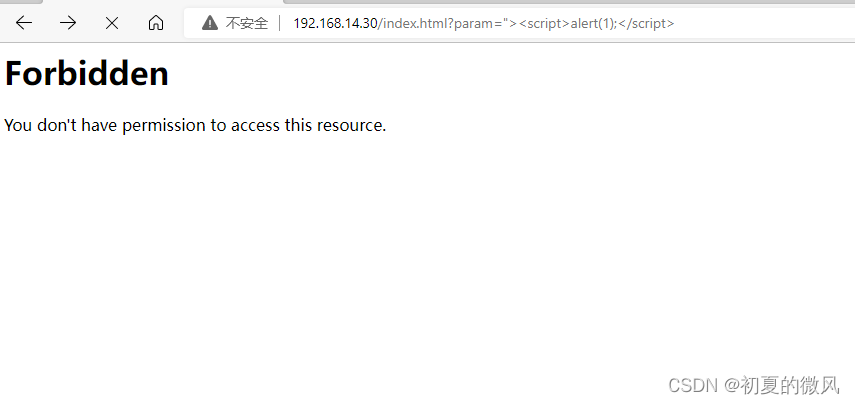
添加脚本执行参数后,显示403被拒绝。
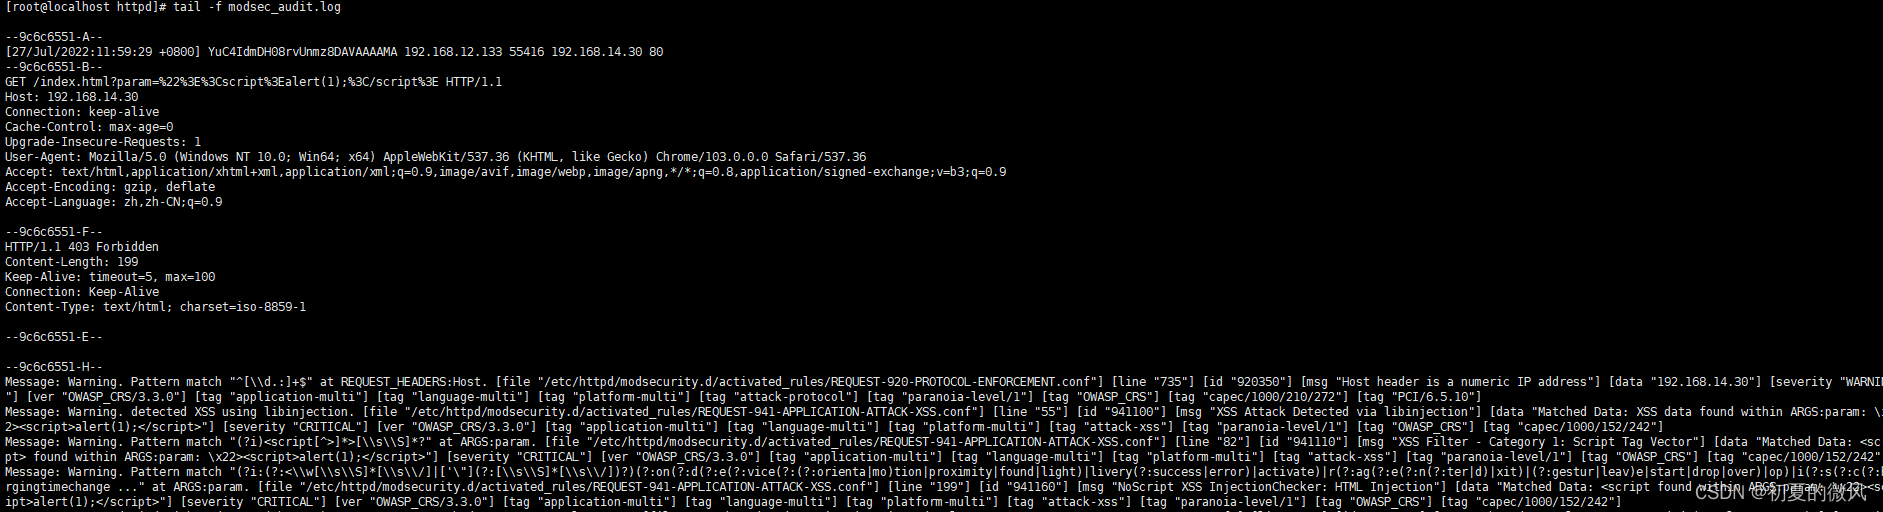
可以通过查看ModSecurity的日志,来确定拦截信息,yum安装的ModSecurity日志默认存放在/var/log/httpd/目录下。
在某些情况下,不希望拦截对所有的vhost都生效,那我们就可以只对单独的vhost配置ModSecurity。单独配置的情况下,需要将
/etc/httpd/conf.d/mod_security.conf文件内的SecRuleEngine和SecRequestBodyAccess都设置为Off,然后将下面的配置向加入到需要开启ModSecurity的vhost内。
<IfModule mod_security2.c>
    SecRuleEngine On
    SecRequestBodyAccess On
</IfModule>
SecRuleEngine Detection Only:这个配置项支持设置在单独某个vhost配置文件中,配置后它只会检测当前vhost所有的攻击,并根据攻击产生相应的错误信息,但它不会在服务器上拦截任何请求。
<IfModule mod_security2.c>
    SecRuleEngine Detection Only
</IfModule>
安装依赖包
yum -y install autoconf automake libtool make gcc gcc-c++ lua lua-libs libcurl libxml2 pcre-devel zlib-devel
下载源码包并解压
cd /usr/local/src/
wget https://github.com/SpiderLabs/ModSecurity/releases/download/v3.0.7/modsecurity-v3.0.7.tar.gz
tar -xvf modsecurity-v3.0.7.tar.gz
cd modsecurity-v3.0.7/
编译并安装
./build.sh
./configure			# 可以通过--prefix=/path来指定安装目录,未指定默认安装到/usr/local/modsecurity目录下。
make
make install
ModSecurity-nginx作为nginx的一个模块进行加载,所以需要和nginx一起进行编译,nginx源码包的版本需要和你所使用的nginx版本相同。
wget https://github.com/SpiderLabs/ModSecurity-nginx/releases/download/v1.0.3/modsecurity-nginx-v1.0.3.tar.gz
wget http://nginx.org/download/nginx-1.22.0.tar.gz
tar -xvf modsecurity-nginx-v1.0.3.tar.gz
tar -xvf nginx-1.22.0.tar.gz
cd nginx-1.22.0
将ModSecurity-nginx编译为nginx动态模块
./configure --add-dynamic-module=/usr/local/src/modsecurity-nginx-v1.0.3 --with-compat
make
将编译好的模块放到nginx的modules目录下
cp objs/ngx_http_modsecurity_module.so /etc/nginx/modules/
然后在nginx.conf 中添加一行load_module modules/ngx_http_modsecurity_module.so;,需要添加在nginx全局配置中。
user  nginx;
worker_processes  auto;
load_module modules/ngx_http_modsecurity_module.so;

error_log  /var/log/nginx/error.log notice;
pid        /var/run/nginx.pid;


events {
    worker_connections  1024;
}
将modsecurity源码目录内的modsecurity.conf-recommended复制到modsecurity的安装目录。
cd /usr/local/modsecurity
mkdir conf		# 创建一个conf目录
cp /usr/local/src/modsecurity-v3.0.7/modsecurity.conf-recommended conf/modsecurity.conf
cp /usr/local/src/modsecurity-v3.0.7/unicode.mapping conf/unicode.mapping
复制过去后需要修改modsecurity.conf中配置项。
SecRuleEngine DetectionOnly # 默认是只检测不拦截,需要修改为On;
1、 modsecurity
开启或关闭modsecurity功能
请注意,此配置指令不再与SecRule状态相关。相反,它现在仅作为nginx标志来启用或禁用模块。
2、modsecurity_rules_file
指定 modsecurity 配置文件的位置,例如:
server {
    modsecurity on;
    location / {
        root /var/www/html;
        modsecurity_rules_file /etc/my_modsecurity_rules.conf;
    }
}
3、modsecurity_rules_remote
指定modsecurity配置文件的下载URL和用于对该服务器进行身份验证的密钥。
server {
    modsecurity on;
    location / {
        root /var/www/html;
        modsecurity_rules_remote my-server-key https://my-own-server/rules/download;
    }
}
4、modsecurity_rules
在nginx配置中直接包含ModSecurity规则。以下示例是从配置文件加载规则并为每个location注入特定配置;
server {
    modsecurity on;
    location / {
        root /var/www/html;
        modsecurity_rules_file /etc/my_modsecurity_rules.conf;
    }
    location /ops {
        root /var/www/html/opts;
        modsecurity_rules '
          SecRuleEngine On
          SecDebugLog /tmp/modsec_debug.log
          SecDebugLogLevel 9
          SecRuleRemoveById 10
        ';
    }
}
5、modsecurity_transaction_id
允许从 Nginx 传递事务ID,而不是在库中自动生成,有利于在 ModSecurity 中跟踪查看请求,可以参考以下配置:
log_format extended '$remote_addr - $remote_user [$time_local] '
                    '"$request" $status $body_bytes_sent '
                    '"$http_referer" "$http_user_agent" $request_id';

server {
    server_name host1;
    modsecurity on;
    modsecurity_transaction_id "host1-$request_id";
    access_log logs/host1-access.log extended;
    error_log logs/host1-error.log;
    location / {
        ...
    }
}

server {
    server_name host2;
    modsecurity on;
    modsecurity_transaction_id "host2-$request_id";
    access_log logs/host2-access.log extended;
    error_log logs/host2-error.log;
    location / {
        ...
    }
}
cd /usr/local/modsecurity/
mkdir crs/
cd crs
wget https://github.com/coreruleset/coreruleset/archive/refs/tags/v3.3.2.tar.gz
tar -xvf v3.3.2.tar.gz
cd coreruleset-3.3.2
mv crs-setup.conf.example crs-setup.conf
在modsecurity配置文件指定规则集的目录,在modsecurity.conf文件末尾加上下面两个配置。
include /usr/local/modsecurity/crs/coreruleset-3.3.2/crs-setup.conf
include /usr/local/modsecurity/crs/coreruleset-3.3.2/rules/*.conf
如果你的nginx没有加载GeoIP模块的话,还需要注释掉rules/REQUEST-910-IP-REPUTATION.conf文件中的这条规则。
SecRule TX:HIGH_RISK_COUNTRY_CODES "!@rx ^$" \
    "id:910100,\
    phase:2,\
    block,\
    t:none,\
    msg:'Client IP is from a HIGH Risk Country Location',\
    logdata:'%{MATCHED_VAR}',\
    tag:'application-multi',\
    tag:'language-multi',\
    tag:'platform-multi',\
    tag:'attack-reputation-ip',\
    tag:'paranoia-level/1',\
    tag:'OWASP_CRS',\
    ver:'OWASP_CRS/3.3.2',\
    severity:'CRITICAL',\
    chain"
    SecRule TX:REAL_IP "@geoLookup" \
        "chain"
        SecRule GEO:COUNTRY_CODE "@within %{tx.high_risk_country_codes}" \
            "setvar:'tx.anomaly_score_pl1=+%{tx.critical_anomaly_score}',\
            setvar:'ip.reput_block_flag=1',\
            setvar:'ip.reput_block_reason=%{rule.msg}',\
            expirevar:'ip.reput_block_flag=%{tx.reput_block_duration}'"
如果没注释的话会提示如下报错。
nginx: [emerg] "modsecurity_rules_file" directive Rules error. File: /usr/local/modsecurity/crs/coreruleset-3.3.2/rules/REQUEST-910-IP-REPUTATION.conf. Line: 76. Column: 22. This version of ModSecurity was not compiled with GeoIP or MaxMind support.  in /etc/nginx/conf.d/default.conf:10
nginx: configuration file /etc/nginx/nginx.conf test failed
cd /etc/nginx/conf.d
vim default.conf
在配置文件中加入modsecurity配置
server {
    listen       80;
    server_name  localhost;

    #access_log  /var/log/nginx/host.access.log  main;


    modsecurity on;			# 开启modsecurity模块
    modsecurity_rules_file /usr/local/modsecurity/conf/modsecurity.conf;	# 指定modsecurity配置文件

    location / {
        root   /usr/share/nginx/html;
        index  index.html index.htm;
    }

    error_page   500 502 503 504  /50x.html;
    location = /50x.html {
        root   /usr/share/nginx/html;
    }
}
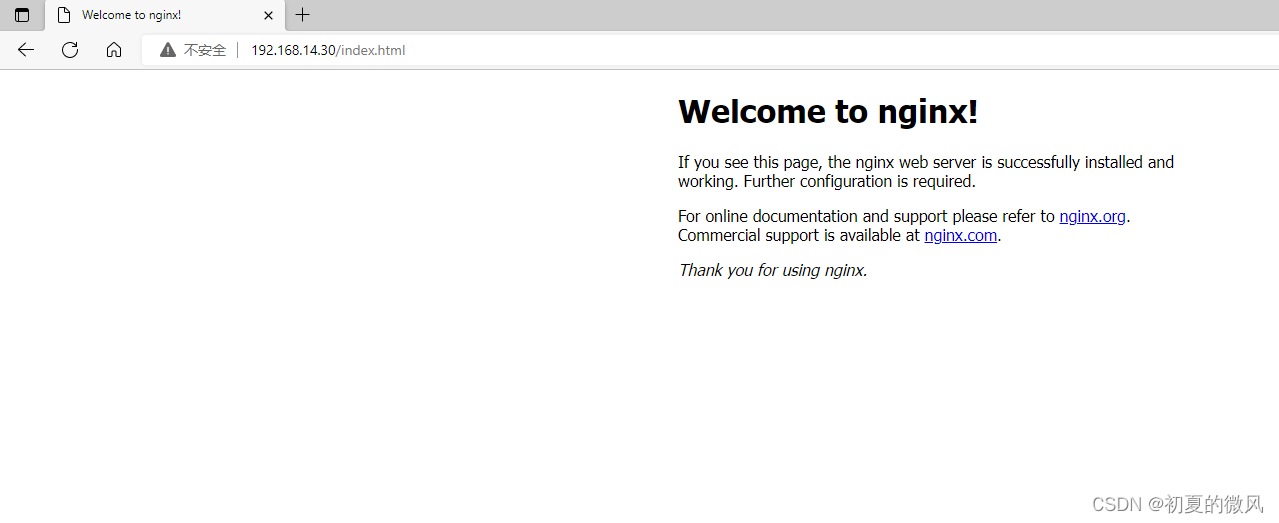
在没有添加执行脚本的情况下可以正常访问。
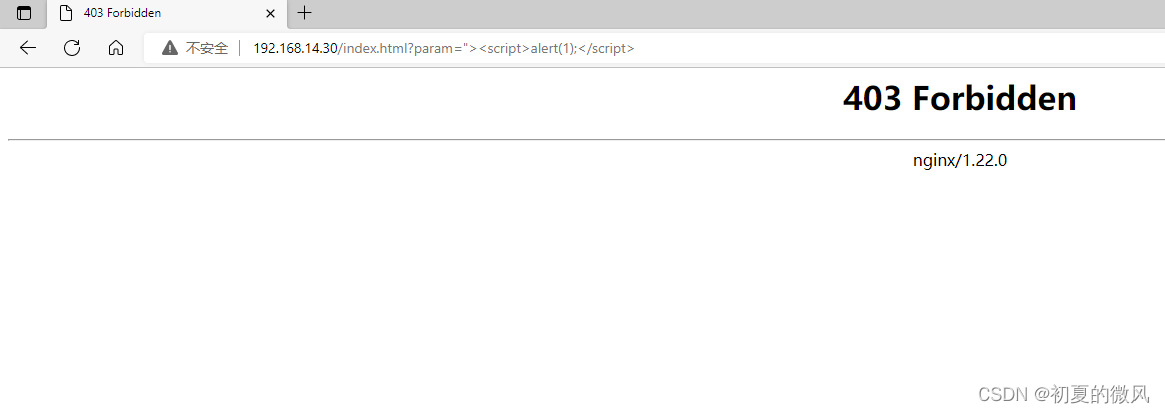
加入脚本执行参数后显示403。
假设我做了一个模块如下:m=Module.newdoclassCendend三个问题:除了对m的引用之外,还有什么方法可以访问C和m中的其他内容?我可以在创建匿名模块后为其命名吗(就像我输入“module...”一样)?如何在使用完匿名模块后将其删除,使其定义的常量不再存在? 最佳答案 三个答案:是的,使用ObjectSpace.此代码使c引用你的类(class)C不引用m:c=nilObjectSpace.each_object{|obj|c=objif(Class===objandobj.name=~/::C$/)}当然这取决于
作为我的Rails应用程序的一部分,我编写了一个小导入程序,它从我们的LDAP系统中吸取数据并将其塞入一个用户表中。不幸的是,与LDAP相关的代码在遍历我们的32K用户时泄漏了大量内存,我一直无法弄清楚如何解决这个问题。这个问题似乎在某种程度上与LDAP库有关,因为当我删除对LDAP内容的调用时,内存使用情况会很好地稳定下来。此外,不断增加的对象是Net::BER::BerIdentifiedString和Net::BER::BerIdentifiedArray,它们都是LDAP库的一部分。当我运行导入时,内存使用量最终达到超过1GB的峰值。如果问题存在,我需要找到一些方法来更正我的代
我有一个包含模块的模型。我想在模块中覆盖模型的访问器方法。例如:classBlah这显然行不通。有什么想法可以实现吗? 最佳答案 您的代码看起来是正确的。我们正在毫无困难地使用这个确切的模式。如果我没记错的话,Rails使用#method_missing作为属性setter,因此您的模块将优先,阻止ActiveRecord的setter。如果您正在使用ActiveSupport::Concern(参见thisblogpost),那么您的实例方法需要进入一个特殊的模块:classBlah
我刚刚被困在这个问题上一段时间了。以这个基地为例:moduleTopclassTestendmoduleFooendend稍后,我可以通过这样做在Foo中定义扩展Test的类:moduleTopmoduleFooclassSomeTest但是,如果我尝试通过使用::指定模块来最小化缩进:moduleTop::FooclassFailure这失败了:NameError:uninitializedconstantTop::Foo::Test这是一个错误,还是仅仅是Ruby解析变量名的方式的逻辑结果? 最佳答案 Isthisabug,or
我是Google云的新手,我正在尝试对其进行首次部署。我的第一个部署是RubyonRails项目。我基本上是在关注thisguideinthegoogleclouddocumentation.唯一的区别是我使用的是我自己的项目,而不是他们提供的“helloworld”项目。这是我的app.yaml文件runtime:customvm:trueentrypoint:bundleexecrackup-p8080-Eproductionconfig.ruresources:cpu:0.5memory_gb:1.3disk_size_gb:10当我转到我的项目目录并运行gcloudprevie
我想获取模块中定义的所有常量的值:moduleLettersA='apple'.freezeB='boy'.freezeendconstants给了我常量的名字:Letters.constants(false)#=>[:A,:B]如何获取它们的值的数组,即["apple","boy"]? 最佳答案 为了做到这一点,请使用mapLetters.constants(false).map&Letters.method(:const_get)这将返回["a","b"]第二种方式:Letters.constants(false).map{|c
我的假设是moduleAmoduleBendend和moduleA::Bend是一样的。我能够从thisblog找到解决方案,thisSOthread和andthisSOthread.为什么以及什么时候应该更喜欢紧凑语法A::B而不是另一个,因为它显然有一个缺点?我有一种直觉,它可能与性能有关,因为在更多命名空间中查找常量需要更多计算。但是我无法通过对普通类进行基准测试来验证这一点。 最佳答案 这两种写作方法经常被混淆。首先要说的是,据我所知,没有可衡量的性能差异。(在下面的书面示例中不断查找)最明显的区别,可能也是最著名的,是你的
我一直致力于让我们的Rails2.3.8应用程序在JRuby下正确运行。一切正常,直到我启用config.threadsafe!以实现JRuby提供的并发性。这导致lib/中的模块和类不再自动加载。使用config.threadsafe!启用:$rubyscript/runner-eproduction'pSim::Sim200Provisioner'/Users/amchale/.rvm/gems/jruby-1.5.1@web-services/gems/activesupport-2.3.8/lib/active_support/dependencies.rb:105:in`co
我可以在Azure网站上部署RubyonRails吗? 最佳答案 还没有。目前仅支持.NET和PHP。 关于ruby-on-rails-RubyonRails可以部署在Azure网站上吗?,我们在StackOverflow上找到一个类似的问题: https://stackoverflow.com/questions/12964010/
前置步骤我们都操作完了,这篇开始介绍jenkins的集成。话不多说,看操作1、登录进入jenkins后会让你选择安装插件,选择第一个默认的就行。安装完成后设置账号密码,重新登录。2、配置JDK和Git都需要执行路径,所以需要先把执行路径找到,先进入服务器的docker容器,2.1JDK的路径root@69eef9ee86cf:/usr/bin#echo$JAVA_HOME/usr/local/openjdk-82.2Git的路径root@69eef9ee86cf:/#whichgit/usr/bin/git3、先配置JDK和Git。点击:ManageJenkins>>GlobalToolCon