文章目录
本篇,我们将对QSS样式表进行简单介绍,并且使用QSS样式表实现界面换肤功能。
通过点击主界面的设置按钮,进入皮肤设置界面。选择想要设置的皮肤,并单击确定就能实现界面换肤。
控件指针 -> setStyleSheet("控件类型{属性1:属性值;属性2:属性值;}"); //创建标签
QLabel *title = new QLabel("iQIYI爱奇艺",this);
//标签位置大小初始化
title->setGeometry(250,265,180,50);
//使用样式表自定义标签外观
title->setStyleSheet("QLabel{font-size:30px;font-style:微软雅黑;font-weight:bold}");
以上案例实现了,将标签中的文字设置为:
30px(字号),微软雅黑(字体),bold(加粗)。
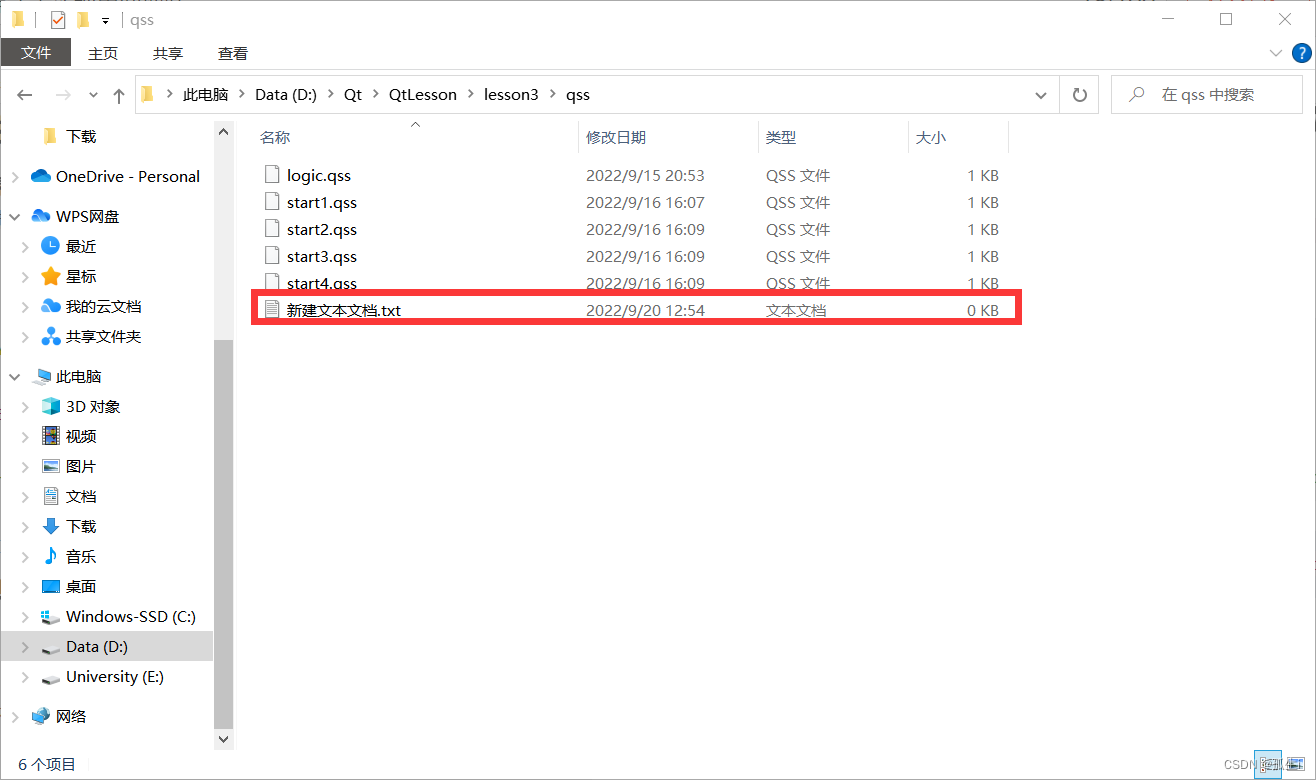
(1)在工程文件中,创建新建文本文档(记事本)、
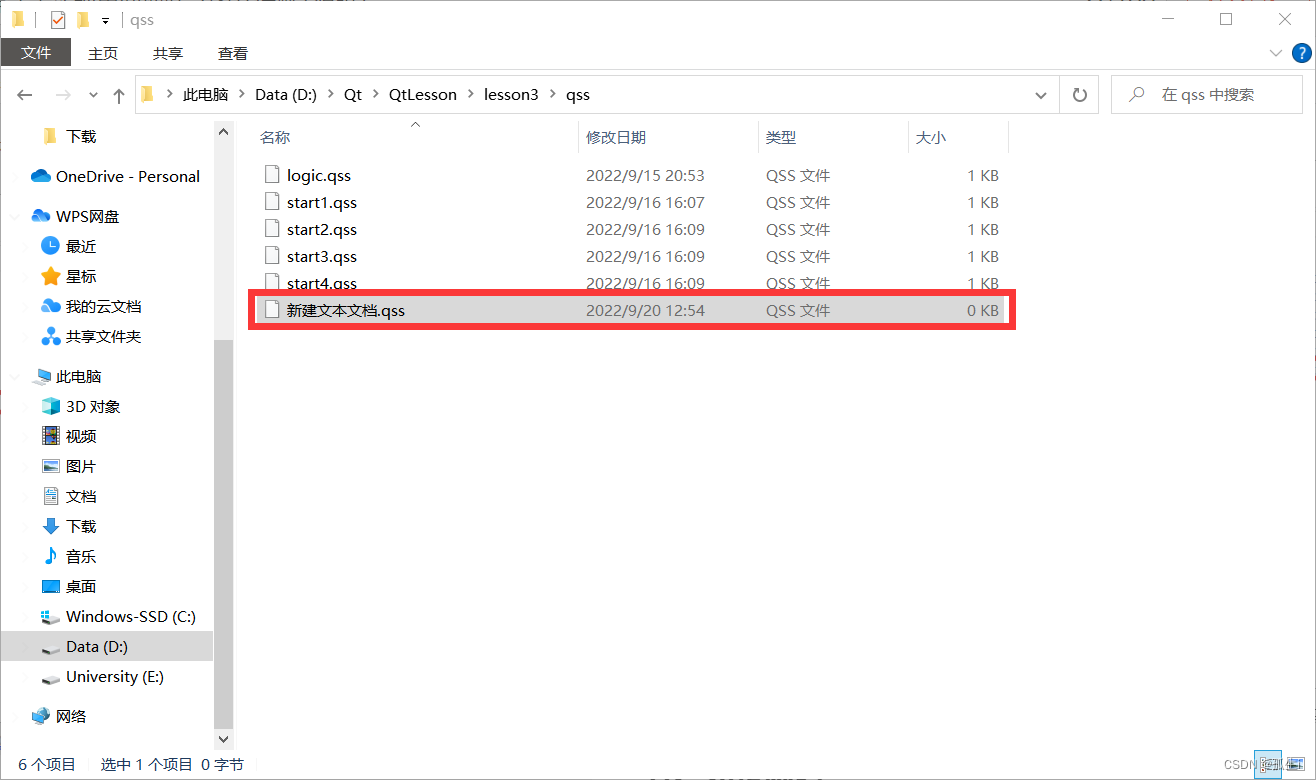
 (2)将新建文本文档后缀改为.qss
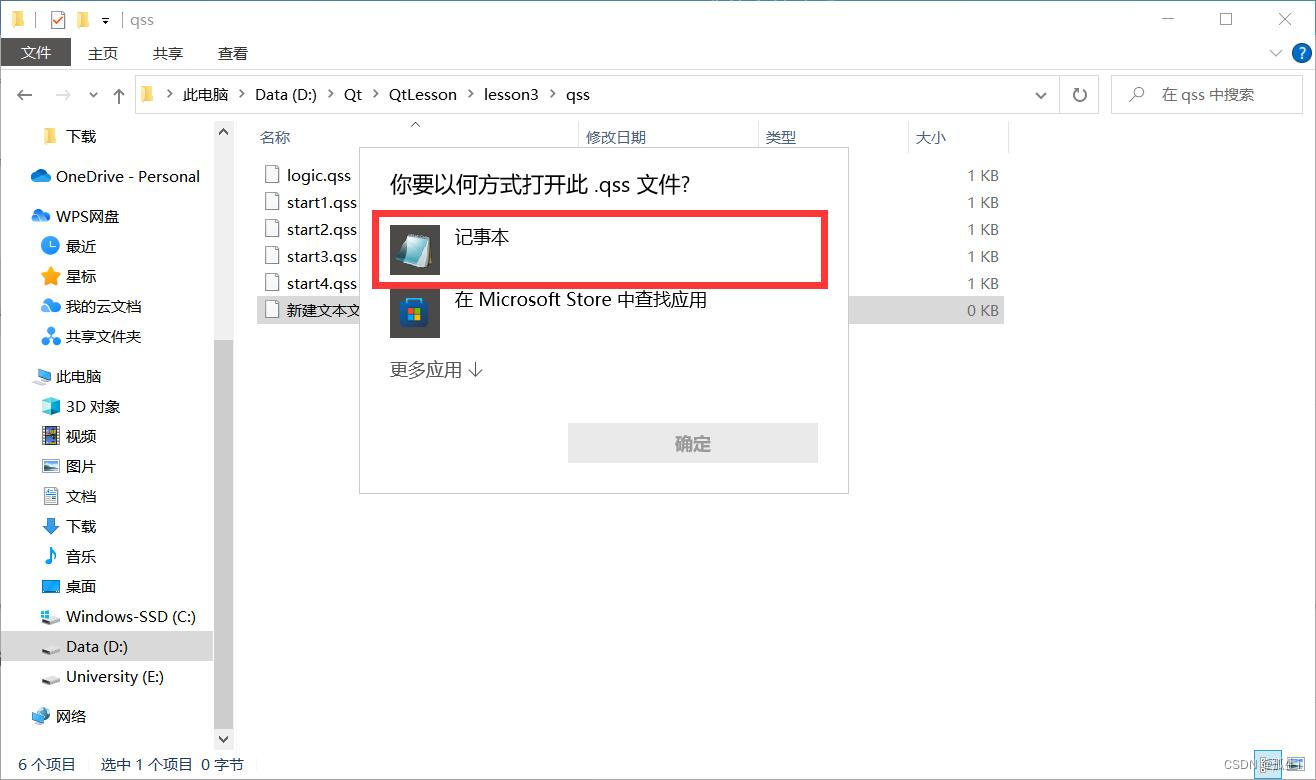
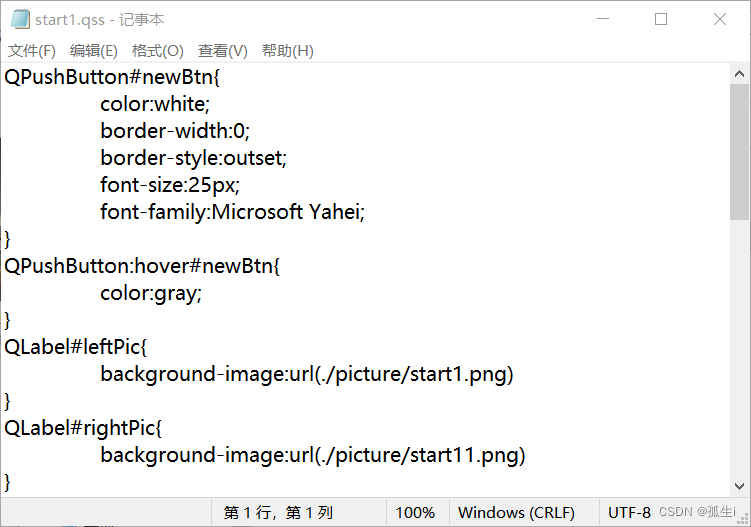
(3)以记事本打开的方式对.qss文件进行编辑
选择器{属性1:属性值;属性2:属性值;}| 类型 | 实例 | 含义 |
|---|---|---|
| 通配选择器 | * | 匹配所有控件 |
| 类型选择器 | QPushButton | 匹配所有QPushButton和其子类的实例 |
| 属性选择器 | QPushButton[flat="false"] | 匹配所有flat属性是false的QPushButton实例(可以是自定义属性,) |
| 类选择器 | .QPushButton | 匹配所欲哦QPushButton的实例,但不匹配其子类,注意前面有一个点号 |
| ID选择器 | #myButton | 匹配所有id为myButton的控件实例,这里的id需要用setObjectName函数设置 |
| 后代选择器 | QDialog QPushButton | 所有QDialog容器中包含的QPushButton(直接或间接) |
| 子选择器 | QDialog > QPushButton | 所有QDialog容器下面的QPushButton(直接) |
我们可以在窗口中,以读入qss文件到字符串的方式,设置该窗口的QSS,具体代码如下。
void startWin::setQss(QString filename)
{
	//创建文件
    QFile file(filename);
    //只读方式打开文件
    file.open(QFile::ReadOnly);
    //将文件转换成文本流形式
    QTextStream filetext(&file);
    //将文本流中的所有字符存入新建字符串
    QString stylesheet = filetext.readAll();
    //设置该窗口的QSS
    this->setStyleSheet(stylesheet);
    //关闭文件
    file.close();
}
void setWin::changeQssColor()
{
//接收下拉框当前文本信息
QString str = this->combo->currentText();
//获取主界面
startWin *start = startWin::getInstance();
//根据下拉框信息,设置不同皮肤
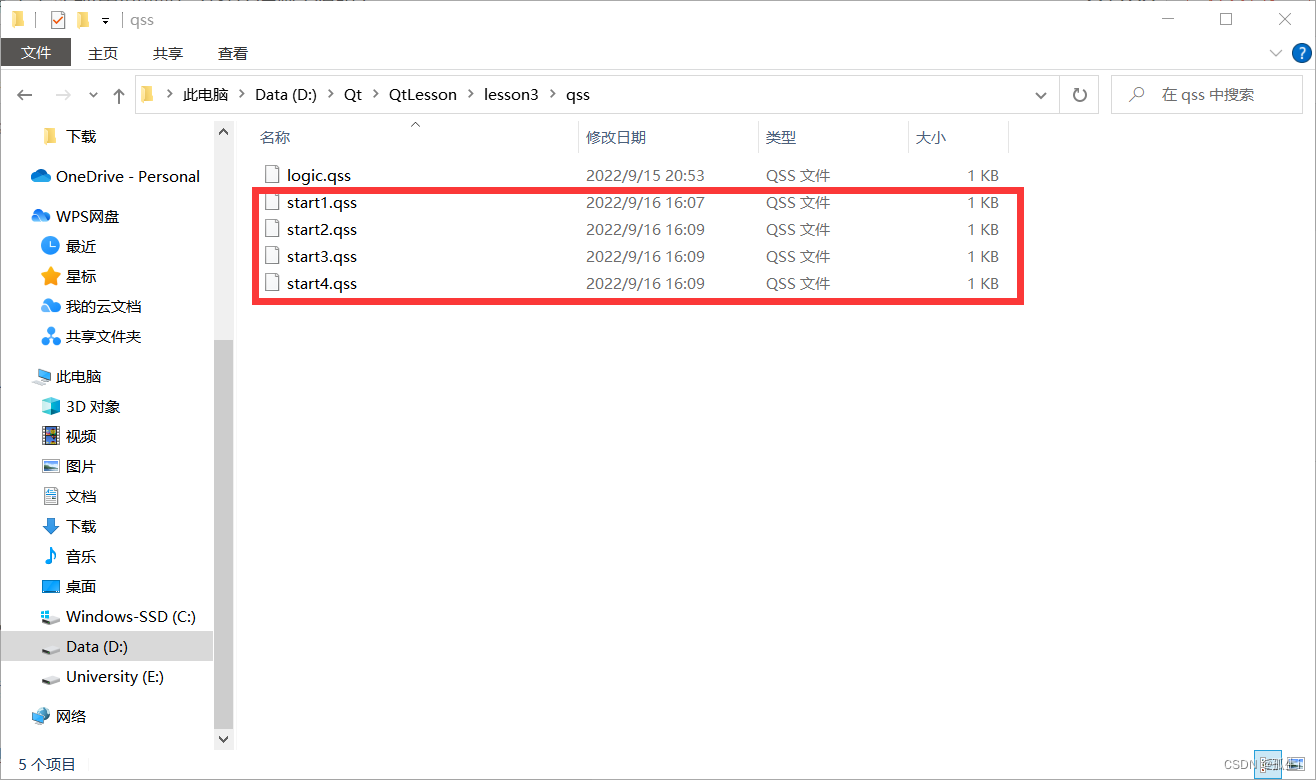
if(str == "天际蓝")
{
start->setQss("./qss/start1.qss");
}
else if(str == "低调灰")
{
start->setQss("./qss/start2.qss");
}
else if(str == "清新绿")
{
start->setQss("./qss/start3.qss");
}
else if(str == "活力紫")
{
start->setQss("./qss/start4.qss");
}
//关闭设置界面
this->close();
}
#include "widget.h"
#include <QApplication>
#include "startwin.h"

int main(int argc, char *argv[])
{
    QApplication a(argc, argv);
    startWin *w = startWin::getInstance();
    w->show();
    return a.exec();
}
#ifndef STARTWIN_H
#define STARTWIN_H

#include <QWidget>
#include <QLabel>
#include <QLineEdit>
#include <QPushButton>
#include <QHBoxLayout>
#include <QVBoxLayout>
#include <QListWidget>
#include <QCloseEvent>

class startWin : public QWidget
{
    Q_OBJECT
private:
    explicit startWin(QWidget *parent = 0);
    static startWin *start;
public:
    static startWin *getInstance();
    QLabel *bg,*leftPic,*rightPic,*topPic;
    QLineEdit *edit1;
    QPushButton *newBtn1,*newBtn2,*newBtn3,*newBtn4,*newBtn5,*newBtn6,*newBtn7,*newBtn8;
    QVBoxLayout *leftLayout;
    QHBoxLayout *topLayout;
    QListWidget *videowins;
    QWidget *leftWin,*topWin;
    void closeEvent(QCloseEvent *event);
    void setQss(QString filename);
signals:

public slots:
    void settingSlot();
    void choseSolt();
};

#endif // STARTWIN_H
#include <QDir>
#include <QDebug>
#include <QPixmap>
#include <QStringList>
#include <QMessageBox>
#include "startwin.h"
#include "setwin.h"

startWin* startWin::start = nullptr;

/***************************************************************
* 函数名称: startWin
* 函数功能: 默认构造函数
* 参   数: parent:父类窗口
* 返 回 值: 无
***************************************************************/
startWin::startWin(QWidget *parent) : QWidget(parent)
{
    //设置主界面窗口大小
    this->setFixedSize(1200,747);

    //设置默认QSS
    this->setQss("./qss/start3.qss");

    //窗口背景图(白底)
    this->bg = new QLabel(this);
    this->bg->setGeometry(0,0,1200,747);
    this->bg->setPixmap(QPixmap("./picture/logic2.png"));
    this->bg->setScaledContents(true);

    //左窗口背景图
    this->leftPic = new QLabel(this);
    this->leftPic->setObjectName("leftPic");
    this->leftPic->setGeometry(0,0,181,747);

    //右上角图片
    this->rightPic = new QLabel(this);
    this->rightPic->setObjectName("rightPic");
    this->rightPic->setGeometry(655,0,545,70);

    //顶部图片传一log
    this->topPic = new QLabel(this);
    this->topPic->setGeometry(220,15,400,50);
    this->topPic->setPixmap(QPixmap("./picture/log.png"));
    this->topPic->setScaledContents(true);

    /************创建左窗口************/
    this->leftWin = new QWidget(this);
    this->leftWin->setGeometry(20,0,150,747);

    //创建垂直布局管理器
    this->leftLayout = new QVBoxLayout(leftWin);

    //压缩布局
    this->leftLayout->addStretch();

    //创建按钮内容链表
    QStringList leftList;
    leftList << "全部" << "电视剧" << "电影" << "综艺" << "儿童" << "动漫" << "游戏" << "纪录片" << "体育" << "知识" << "直播" << "随刻热点";

    //根据按钮链表内容生成按钮,并添加到垂直布局管理器
    for(int i=0;i<leftList.size();i++)
    {
        //新建按钮
        QPushButton *newBtn = new QPushButton(leftList.at(i));
        //设置按钮的objectname
        newBtn->setObjectName("newBtn");
        //将按钮添加到垂直布局管理器
        leftLayout->addWidget(newBtn);
        //设置各按钮之间的间隔
        leftLayout->addSpacing(16);
        //创建按钮槽函数
        connect(newBtn,SIGNAL(clicked(bool)),this,SLOT(choseSolt()));
    }
    //设置按钮与窗口底部的间隔
    leftLayout->addSpacing(10);

    /************创建上窗口************/
    this->topWin = new QWidget(this);
    this->topWin->setGeometry(181,0,1030,70);

    //创建水平布局管理器
    this->topLayout = new QHBoxLayout(topWin);
    this->topLayout->addStretch();

    //登录注册按钮
    this->newBtn6 = new QPushButton("登录");
    this->newBtn6->setFixedSize(50,30);
    this->topLayout->addWidget(newBtn6);
    this->topLayout->addSpacing(10);

    this->newBtn7 = new QPushButton("注册");
    this->newBtn7->setFixedSize(50,30);
    this->topLayout->addWidget(newBtn7);
    this->topLayout->addSpacing(10);

    this->newBtn8 = new QPushButton("个人中心",this);
    this->newBtn8->setGeometry(690,20,80,30);
    this->newBtn8->hide();

    //创建输入框
    this->edit1 = new QLineEdit();
    this->edit1->setFixedSize(150,30);
    this->topLayout->addWidget(edit1);
    this->topLayout->addSpacing(10);

    //创建搜索按钮,并添加到水平布局管理器
    this->newBtn1 = new QPushButton();
    this->newBtn1->setObjectName("newBtn1");
    this->newBtn1->setFixedSize(30,30);
    this->topLayout->addWidget(newBtn1);
    this->topLayout->addSpacing(10);

    //创建设置按钮,并添加到水平布局管理器
    this->newBtn2 = new QPushButton();
    this->newBtn2->setObjectName("newBtn2");
    this->newBtn2->setFixedSize(30,30);
    this->topLayout->addWidget(newBtn2);
    this->topLayout->addSpacing(10);
    connect(this->newBtn2,SIGNAL(clicked(bool)),this,SLOT(settingSlot()));

    //创建缩小按钮,并添加到水平布局管理器
    this->newBtn3 = new QPushButton();
    this->newBtn3->setObjectName("newBtn3");
    this->newBtn3->setFixedSize(30,30);
    this->topLayout->addWidget(newBtn3);
    this->topLayout->addSpacing(10);

    //创建放大按钮,并添加到水平布局管理器
    this->newBtn4 = new QPushButton();
    this->newBtn4->setObjectName("newBtn4");
    this->newBtn4->setFixedSize(30,30);
    this->topLayout->addWidget(newBtn4);
    this->topLayout->addSpacing(10);

    //创建关闭按钮,并添加到水平布局管理器
    this->newBtn5 = new QPushButton();
    this->newBtn5->setObjectName("newBtn5");
    this->newBtn5->setFixedSize(30,30);
    this->topLayout->addWidget(newBtn5);
    this->topLayout->addSpacing(10);

    //创建QListWidget窗口
    this->videowins = new QListWidget(this);
    this->videowins->setGeometry(181,90,1020,657);
    this->videowins->setViewMode(QListView::IconMode);
    this->videowins->setMovement(QListView::Static);
    this->videowins->setResizeMode(QListView::Adjust);
    this->videowins->setIconSize(QSize(1000,500));
    this->videowins->setSpacing(33);

    //存储每个文件夹路径
    QString paths[12] = {"./picture/btn12","./picture/btn11","./picture/btn10","./picture/btn9","./picture/btn8","./picture/btn7","./picture/btn6",
                        "./picture/btn5","./picture/btn4","./picture/btn3","./picture/btn2","./picture/btn1"};

    //遍历各个文件夹显示所有图片信息
    for(int i=0;i<12;i++)
    {
        //Qir定义文件路径
        QDir dir(paths[i]);
        //创建文件筛选链表
        QStringList moviefilenames;
        //添加文件后缀为.png的筛选类型
        moviefilenames << "*.png" << "*.jpg";
        //创建并初始化符合要求的图片到String链表中
        QStringList files = dir.entryList(moviefilenames,QDir::Files|QDir::Readable,QDir::Name);
        //遍历文件链表,将每张图片路径和图片名作为QListWidget的项目添加到QListWidget窗口中
        for(int j = 0; j < files.size(); ++j)
        {
            QString moviename = files.at(j).mid(0,files.at(j).size()-4);
            QListWidgetItem *newitem = new QListWidgetItem(QIcon(QPixmap(paths[i]+"/"+files.at(j))),moviename);
           // newitem->setSizeHint(QSize(,400));   //设置每个item大小
            this->videowins->addItem(newitem);
        }
    }
}

startWin *startWin::getInstance()
{
    //判断系统是否已经有这个单例,如果有则返回,如果没有则创建。
    if(startWin::start == nullptr)
    {
        startWin::start = new startWin();
    }
    return startWin::start;
}

void startWin::closeEvent(QCloseEvent *event)
{
    //创建提示窗口
    QMessageBox *closeMessage = new QMessageBox(QMessageBox::Information,"温馨提示","确认是否退出");
    //显示提示窗口
    closeMessage->show();
    //设置提示窗口按钮
    closeMessage->setStandardButtons(QMessageBox::Ok|QMessageBox::Cancel);
    //接收关闭返回值
    int rec = closeMessage->exec();
    //若点击确定按钮
    if(rec == QMessageBox::Ok)
    {
        event->accept();
    }
    //若点击取消按钮
    else
    {
        event->ignore();
    }
}

void startWin::choseSolt()
{
    //获取触发槽函数的信号
    QString btnText = ((QPushButton*)sender())->text();
    qDebug() << btnText;
    //定义文件路径
    QString path;
    //根据点击不同按钮,设置不同文件路径
    if(btnText == "全部")
    {
        path = "./picture/all";
    }
    if(btnText == "电视剧")
    {
        path = "./picture/btn1";
    }
    if(btnText == "电影")
    {
        path = "./picture/btn2";
    }
    if(btnText == "综艺")
    {
        path = "./picture/btn3";
    }
    if(btnText == "儿童")
    {
        path = "./picture/btn4";
    }
    if(btnText == "动漫")
    {
        path = "./picture/btn5";
    }
    if(btnText == "游戏")
    {
        path = "./picture/btn6";
    }
    if(btnText == "纪录片")
    {
        path = "./picture/btn7";
    }
    if(btnText == "体育")
    {
        path = "./picture/btn8";
    }
    if(btnText == "知识")
    {
        path = "./picture/btn9";
    }
    if(btnText == "直播")
    {
        path = "./picture/btn10";
    }
    if(btnText == "随刻热点")
    {
        path = "./picture/btn11";
    }
    //获取QListWidget的item数
    int count = this->videowins->count();
    //删除QListWidget所有item
    for(int i=0;i<count;i++)
    {
        QListWidgetItem *item = this->videowins->takeItem(0);
        delete(item);
    }
    //将对应路径下的所有图片加载到QListWidget中
    QDir dir(path);
    QStringList moviefilenames;
    moviefilenames << "*.png" << "*.jpg";
    QStringList files = dir.entryList(moviefilenames,QDir::Files|QDir::Readable,QDir::Name);
    for(int i = 0; i < files.size(); ++i)
    {
        QString moviename = files.at(i).mid(0,files.at(i).size()-4);
        QListWidgetItem *newitem = new QListWidgetItem(QIcon(QPixmap(path+"/"+files.at(i))),moviename);
        //newitem->setSizeHint(QSize(240,200));   //设置每个item大小
        videowins->addItem(newitem);
    }
}

/***************************************************************
* 函数名称: setQss
* 函数功能: 主界面皮肤设置
* 参   数: 无
* 返 回 值: 无
***************************************************************/
void startWin::setQss(QString filename)
{
    QFile file(filename);
    file.open(QFile::ReadOnly);
    QTextStream filetext(&file);
    QString stylesheet = filetext.readAll();
    this->setStyleSheet(stylesheet);
    file.close();
}

/***************************************************************
* 函数名称: settingSlot
* 函数功能: 进入设置界面
* 参   数: 无
* 返 回 值: 无
***************************************************************/
void startWin::settingSlot()
{
    setWin *setting = setWin::getInstance();
    setting->setWindowFlags(Qt::WindowStaysOnBottomHint); //窗口置于顶部
    setting->setWindowModality(Qt::ApplicationModal); //阻塞除当前窗体之外的所有的窗体
    setting->show();
}
#ifndef SETWIN_H
#define SETWIN_H

#include <QWidget>
#include <QLabel>
#include <QPushButton>
#include <QComboBox>

class setWin : public QWidget
{
    Q_OBJECT
private:
    explicit setWin(QWidget *parent = 0);
    static setWin *setting;
public:
    static setWin *getInstance();
    QLabel *label;
    QPushButton *pushButton;
    QComboBox *combo;
signals:

public slots:
    void changeQssColor();
};

#endif // SETWIN_H
#include <QStringList>
#include "setwin.h"
#include "startWin.h"

setWin* setWin::setting = nullptr;

setWin::setWin(QWidget *parent) : QWidget(parent)
{
    //设置窗口大小
    this->setFixedSize(300,200);

    //创建标签
    this->label = new QLabel("皮肤设置",this);
    this->label->setGeometry(125,20,80,50);

    //创建按钮
    this->pushButton = new QPushButton("确定",this);
    this->pushButton->setGeometry(210,90,50,30);
    connect(this->pushButton,SIGNAL(clicked(bool)),this,SLOT(changeQssColor()));

    //创建下拉框
    this->combo = new QComboBox(this);
    this->combo->move(50,90);
    this->combo->setFixedSize(150,30);
    QStringList QssColor;
    QssColor << "清新绿" << "天际蓝" << "低调灰" << "活力紫";
    this->combo->addItems(QssColor);
}

setWin *setWin::getInstance()
{
    //判断系统是否已经有这个单例,如果有则返回,如果没有则创建。
    if(setWin::setting == nullptr)
    {
        setWin::setting = new setWin();
    }
    return setWin::setting;
}

void setWin::changeQssColor()
{
    //接收下拉框当前文本信息
    QString str = this->combo->currentText();

    //获取主界面
    startWin *start = startWin::getInstance();

    //根据下拉框信息,设置不同皮肤
    if(str == "天际蓝")
    {
        start->setQss("./qss/start1.qss");
    }
    else if(str == "低调灰")
    {
        start->setQss("./qss/start2.qss");
    }
    else if(str == "清新绿")
    {
        start->setQss("./qss/start3.qss");
    }
    else if(str == "活力紫")
    {
        start->setQss("./qss/start4.qss");
    }

    //关闭设置界面
    this->close();
}
关注博主并在该篇文章下方评论写下邮箱地址,图片素材及相应的qss文件将以压缩包形式发送。
QSS样式表属性可查看:CSDN博主「我是唐」的原创文章《Qt_QSS 样式表属性大全》,原文链接:https://blog.csdn.net/qq_41673920/article/details/97116143。
以上就是QSS样式表实现界面换肤的所有内容,希望大家阅读后都能有所收获!原创不易,转载请标明出处,若文章出现有误之处,欢迎读者留言指正批评!
我有一大串格式化数据(例如JSON),我想使用Psychinruby同时保留格式转储到YAML。基本上,我希望JSON使用literalstyle出现在YAML中:---json:|{"page":1,"results":["item","another"],"total_pages":0}但是,当我使用YAML.dump时,它不使用文字样式。我得到这样的东西:---json:!"{\n\"page\":1,\n\"results\":[\n\"item\",\"another\"\n],\n\"total_pages\":0\n}\n"我如何告诉Psych以想要的样式转储标量?解
我正在为一个项目制作一个简单的shell,我希望像在Bash中一样解析参数字符串。foobar"helloworld"fooz应该变成:["foo","bar","helloworld","fooz"]等等。到目前为止,我一直在使用CSV::parse_line,将列分隔符设置为""和.compact输出。问题是我现在必须选择是要支持单引号还是双引号。CSV不支持超过一个分隔符。Python有一个名为shlex的模块:>>>shlex.split("Test'helloworld'foo")['Test','helloworld','foo']>>>shlex.split('Test"
我有带有Logo图像的公司模型has_attached_file:logo我用他们的Logo创建了许多公司。现在,我需要添加新样式has_attached_file:logo,:styles=>{:small=>"30x15>",:medium=>"155x85>"}我是否应该重新上传所有旧数据以重新生成新样式?我不这么认为……或者有什么rake任务可以重新生成样式吗? 最佳答案 参见Thumbnail-Generation.如果rake任务不适合你,你应该能够在控制台中使用一个片段来调用重新处理!关于相关公司
一、引擎主循环UE版本:4.27一、引擎主循环的位置:Launch.cpp:GuardedMain函数二、、GuardedMain函数执行逻辑:1、EnginePreInit:加载大多数模块int32ErrorLevel=EnginePreInit(CmdLine);PreInit模块加载顺序:模块加载过程:(1)注册模块中定义的UObject,同时为每个类构造一个类默认对象(CDO,记录类的默认状态,作为模板用于子类实例创建)(2)调用模块的StartUpModule方法2、FEngineLoop::Init()1、检查Engine的配置文件找出使用了哪一个GameEngine类(UGame
在前面两节的例子中,主界面窗口的尺寸和标签控件显示的矩形区域等,都是用C++代码编写的。窗口和控件的尺寸都是预估的,控件如果多起来,那就不好估计每个控件合适的位置和大小了。用C++代码编写图形界面的问题就是不直观,因此Qt项目开发了专门的可视化图形界面编辑器——QtDesigner(Qt设计师)。通过QtDesigner就可以很方便地创建图形界面文件*.ui,然后将ui文件应用到源代码里面,做到“所见即所得”,大大方便了图形界面的设计。本节就演示一下QtDesigner的简单使用,学习拖拽控件和设置控件属性,并将ui文件应用到Qt程序代码里。使用QtDesigner设计界面在开始菜单中找到「Q
目录前言滤波电路科普主要分类实际情况单位的概念常用评价参数函数型滤波器简单分析滤波电路构成低通滤波器RC低通滤波器RL低通滤波器高通滤波器RC高通滤波器RL高通滤波器部分摘自《LC滤波器设计与制作》,侵权删。前言最近需要学习放大电路和滤波电路,但是由于只在之前做音乐频谱分析仪的时候简单了解过一点点运放,所以也是相当从零开始学习了。滤波电路科普主要分类滤波器:主要是从不同频率的成分中提取出特定频率的信号。有源滤波器:由RC元件与运算放大器组成的滤波器。可滤除某一次或多次谐波,最普通易于采用的无源滤波器结构是将电感与电容串联,可对主要次谐波(3、5、7)构成低阻抗旁路。无源滤波器:无源滤波器,又称
最近在学习CAN,记录一下,也供大家参考交流。推荐几个我觉得很好的CAN学习,本文也是在看了他们的好文之后做的笔记首先是瑞萨的CAN入门,真的通透;秀!靠这篇我竟然2天理解了CAN协议!实战STM32F4CAN!原文链接:https://blog.csdn.net/XiaoXiaoPengBo/article/details/116206252CAN详解(小白教程)原文链接:https://blog.csdn.net/xwwwj/article/details/105372234一篇易懂的CAN通讯协议指南1一篇易懂的CAN通讯协议指南1-知乎(zhihu.com)视频推荐CAN总线个人知识总
深度学习部署:Windows安装pycocotools报错解决方法1.pycocotools库的简介2.pycocotools安装的坑3.解决办法更多Ai资讯:公主号AiCharm本系列是作者在跑一些深度学习实例时,遇到的各种各样的问题及解决办法,希望能够帮助到大家。ERROR:Commanderroredoutwithexitstatus1:'D:\Anaconda3\python.exe'-u-c'importsys,setuptools,tokenize;sys.argv[0]='"'"'C:\\Users\\46653\\AppData\\Local\\Temp\\pip-instal
我完全不是程序员,正在学习使用Ruby和Rails框架进行编程。我目前正在使用Ruby1.8.7和Rails3.0.3,但我想知道我是否应该升级到Ruby1.9,因为我真的没有任何升级的“遗留”成本。缺点是什么?我是否会遇到与普通gem的兼容性问题,或者甚至其他我不太了解甚至无法预料的问题? 最佳答案 你应该升级。不要坚持从1.8.7开始。如果您发现不支持1.9.2的gem,请避免使用它们(因为它们很可能不被维护)。如果您对gem是否兼容1.9.2有任何疑问,您可以在以下位置查看:http://www.railsplugins.or
如何学习ruby的正则表达式?(对于假人) 最佳答案 http://www.rubular.com/在Ruby中使用正则表达式时是一个很棒的工具,因为它可以立即将结果可视化。 关于ruby-我如何学习ruby的正则表达式?,我们在StackOverflow上找到一个类似的问题: https://stackoverflow.com/questions/1881231/