ansiable playbook链接:
https://download.csdn.net/download/weixin_43798031/87719490
需要注意的点:公司es集群现以三个角色部署分别为 Gateway、Master、Data 简单的理解可以理解为在每台机器上部署了三个es,以端口和配置文件来区分这三个es不同的功能。
我们知道本来安装分词器是件特别简单的事网上的教程也是一大片一大片的,在我们的环境和架构下需要特别注意的是在安装分词器的时候,需要给这三个不同的角色(Gateway、Master、Data)分别安装ik分词器。
在es 5.5版本之后就不需要修改es的配置文件进行配置分词器了。还有一定要用es对应版本的分词器,否则启动的时候会有报错。
elasticsearch version: 7.6.1
elasticsearch ik:7.6.1
elasticsearch-analysis-ik :Releases · medcl/elasticsearch-analysis-ik · GitHub
启动用户:elasticsearch su elasticsearch
路径:/opt 三个es进程
1. 登录ansiable服务器进入/home/sunwenbo/es 目录下,看到如下截图的这些目录及文件

2. 修改vars.yml文件中的配置,该文件为ansiable-playbook的变量文件如下图,修改标记点1 和标记点2
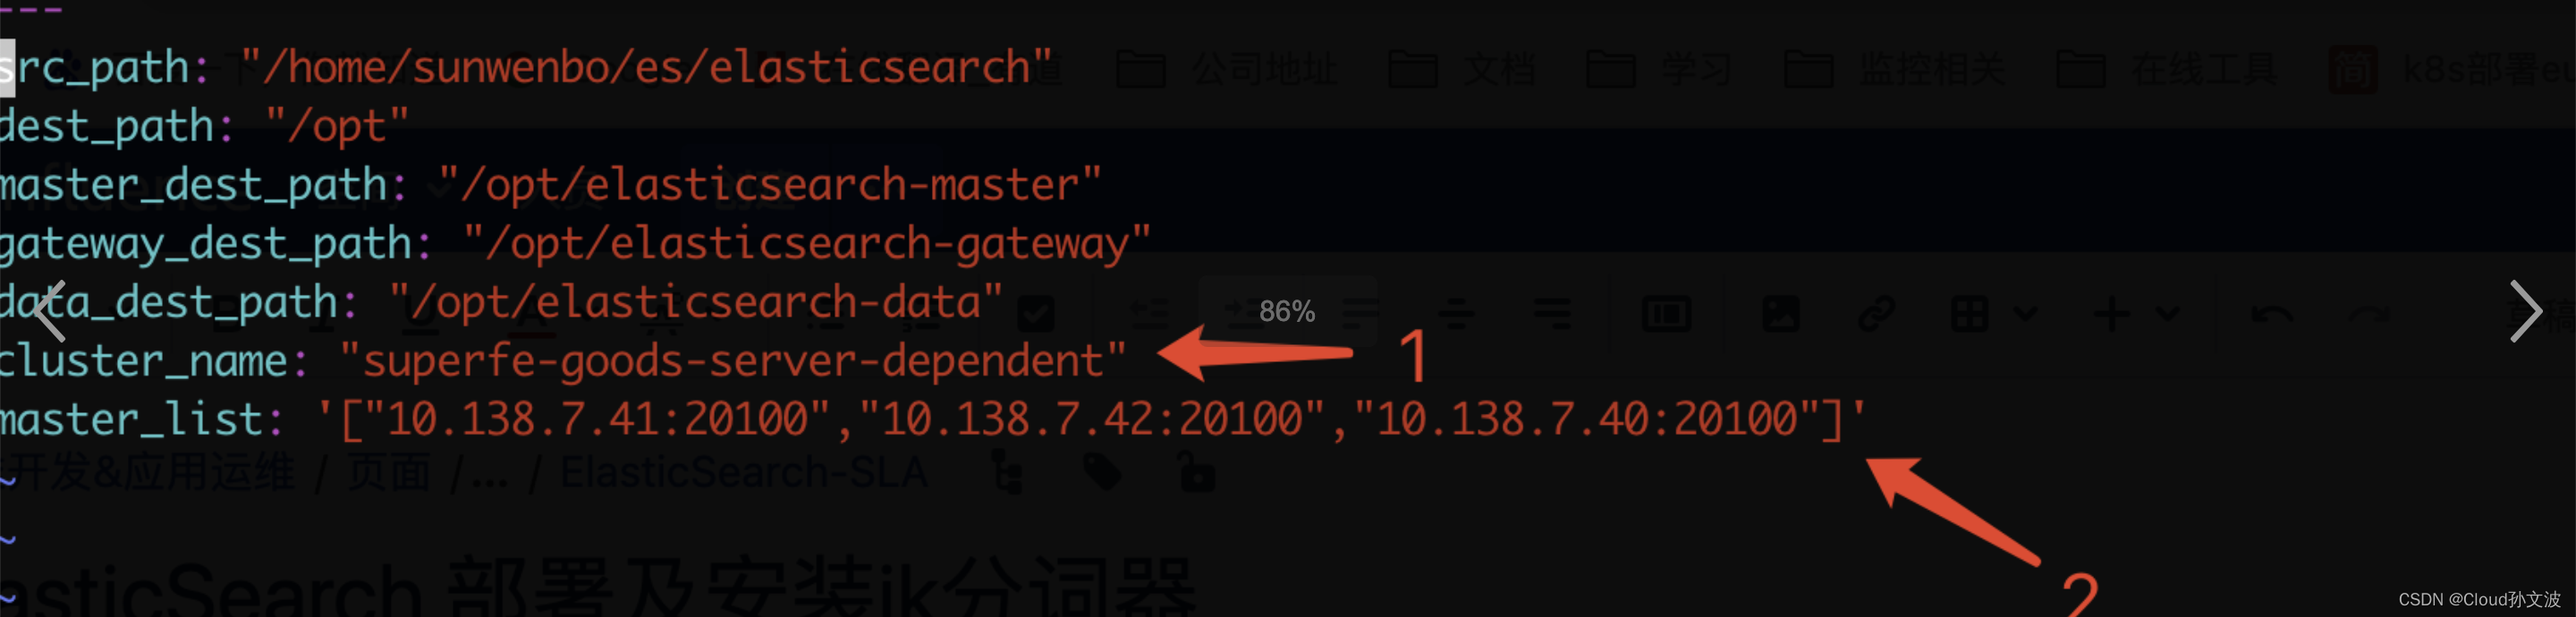
配置说明:
---
#es的源路径,进行安装时,会将该目录发往要安装es的服务器
src_path: "/home/sunwenbo/es/elasticsearch"
#es目标路径
dest_path: "/opt"
#master的目标文件当将elasticsearch发送到目标服务器/opt目录下,会进行对该目录改名
master_dest_path: "/opt/elasticsearch-master"
gateway_dest_path: "/opt/elasticsearch-gateway"
data_dest_path: "/opt/elasticsearch-data"
#集群名称,安装时候需要看工单上申请es集群的名称,如果没有需要和工单发起人确认
cluster_name: "superfe-goods-server-dependent"
#master列表,如果有多个节点的情况下,这里需要填写多个
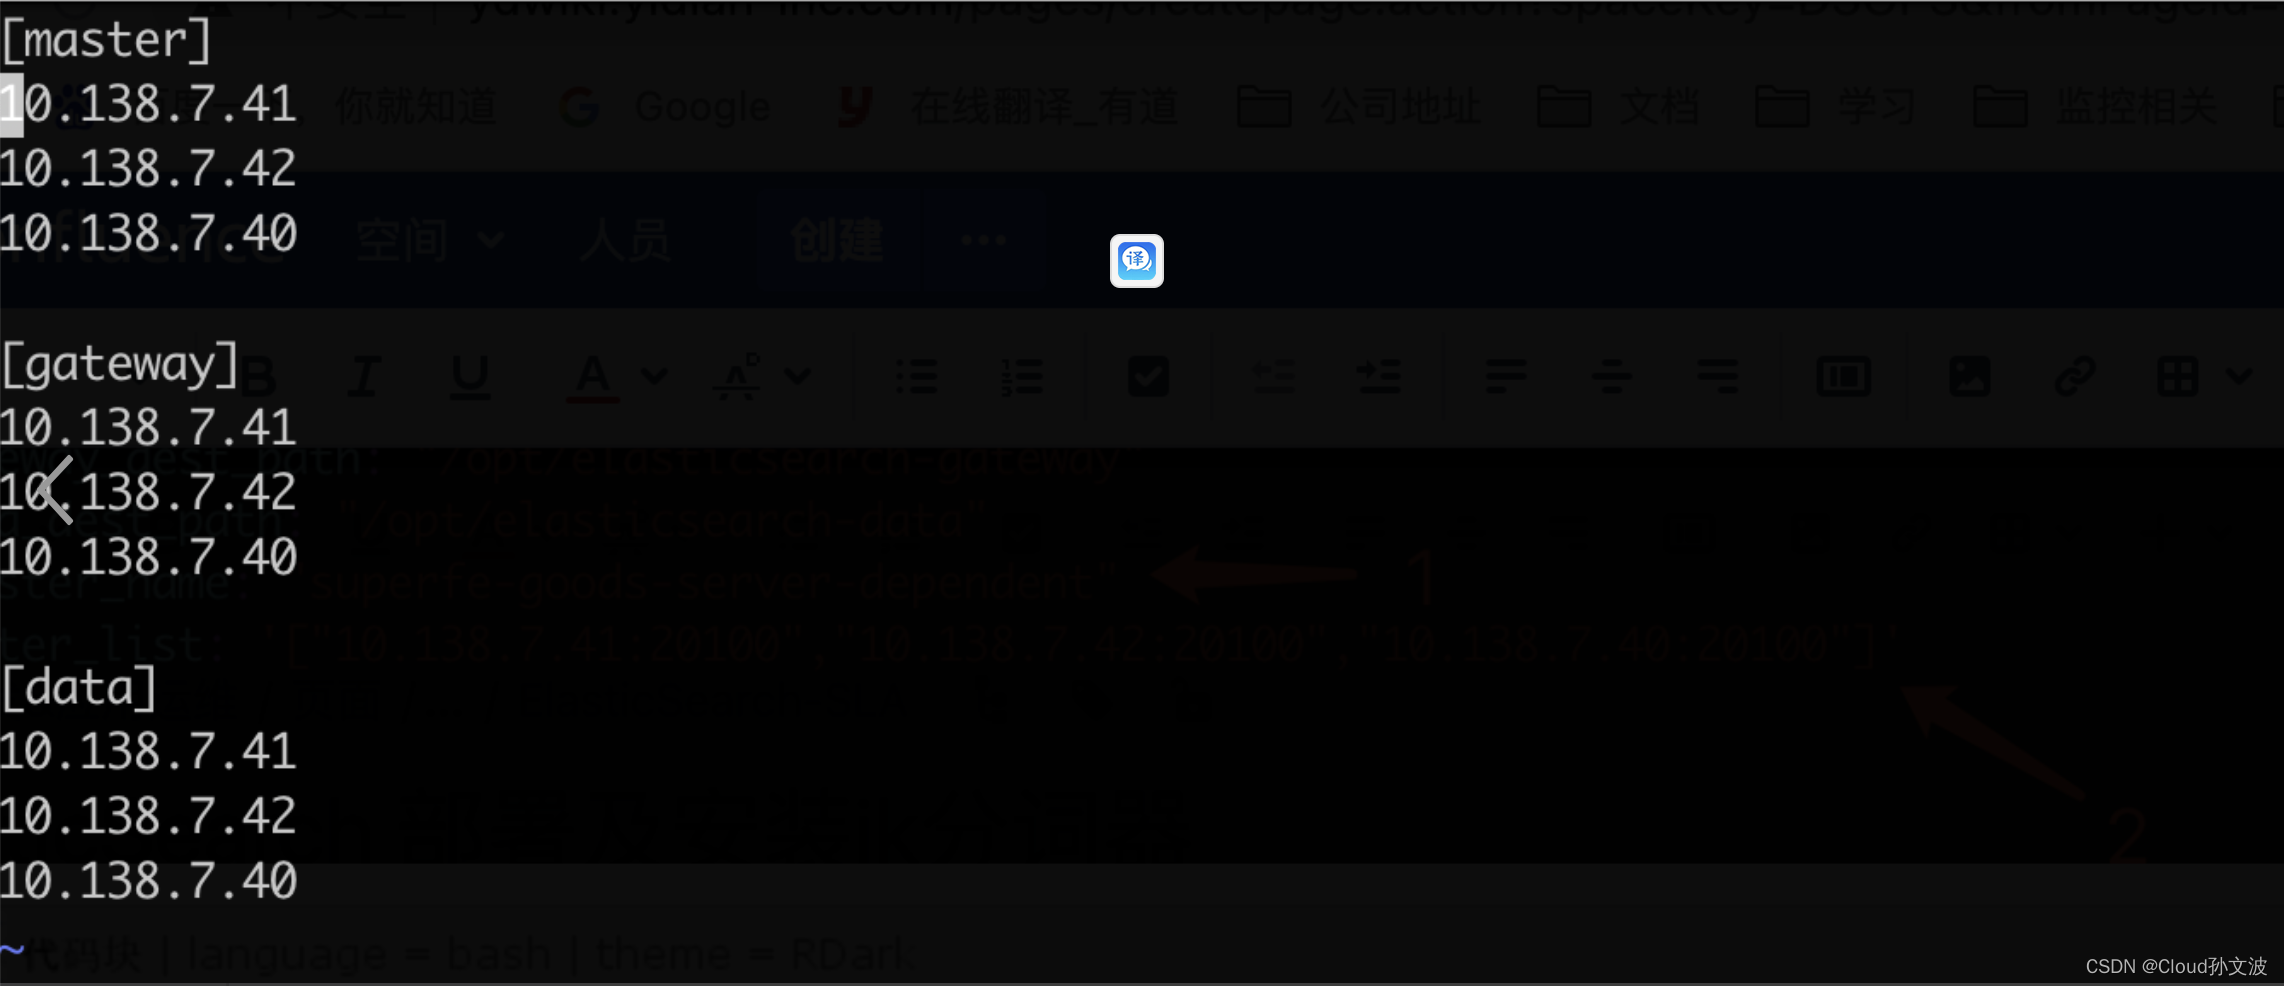
master_list: '["10.138.7.41:20100","10.138.7.42:20100","10.138.7.40:20100"]'3. 修改ip.txt文件,将IP分别填入这个文件
4. 执行安装命令,正常情况下,这时候一个es集群已经配置好了。如果启动失败的话查看/opt/elasticsearch-master/logs/${集群名称}.log日志
ansible-playbook -i ip.txt es.yml -b
1. 执行如下playbook
cd /home/sunwenbo/es
ansible-playbook -i ip.txt ik.yml -b
2. 检查是否安装成功
可以看到我们安装的三个服务器,每个服务器上的三个es角色都已经安装上ik分词器了。

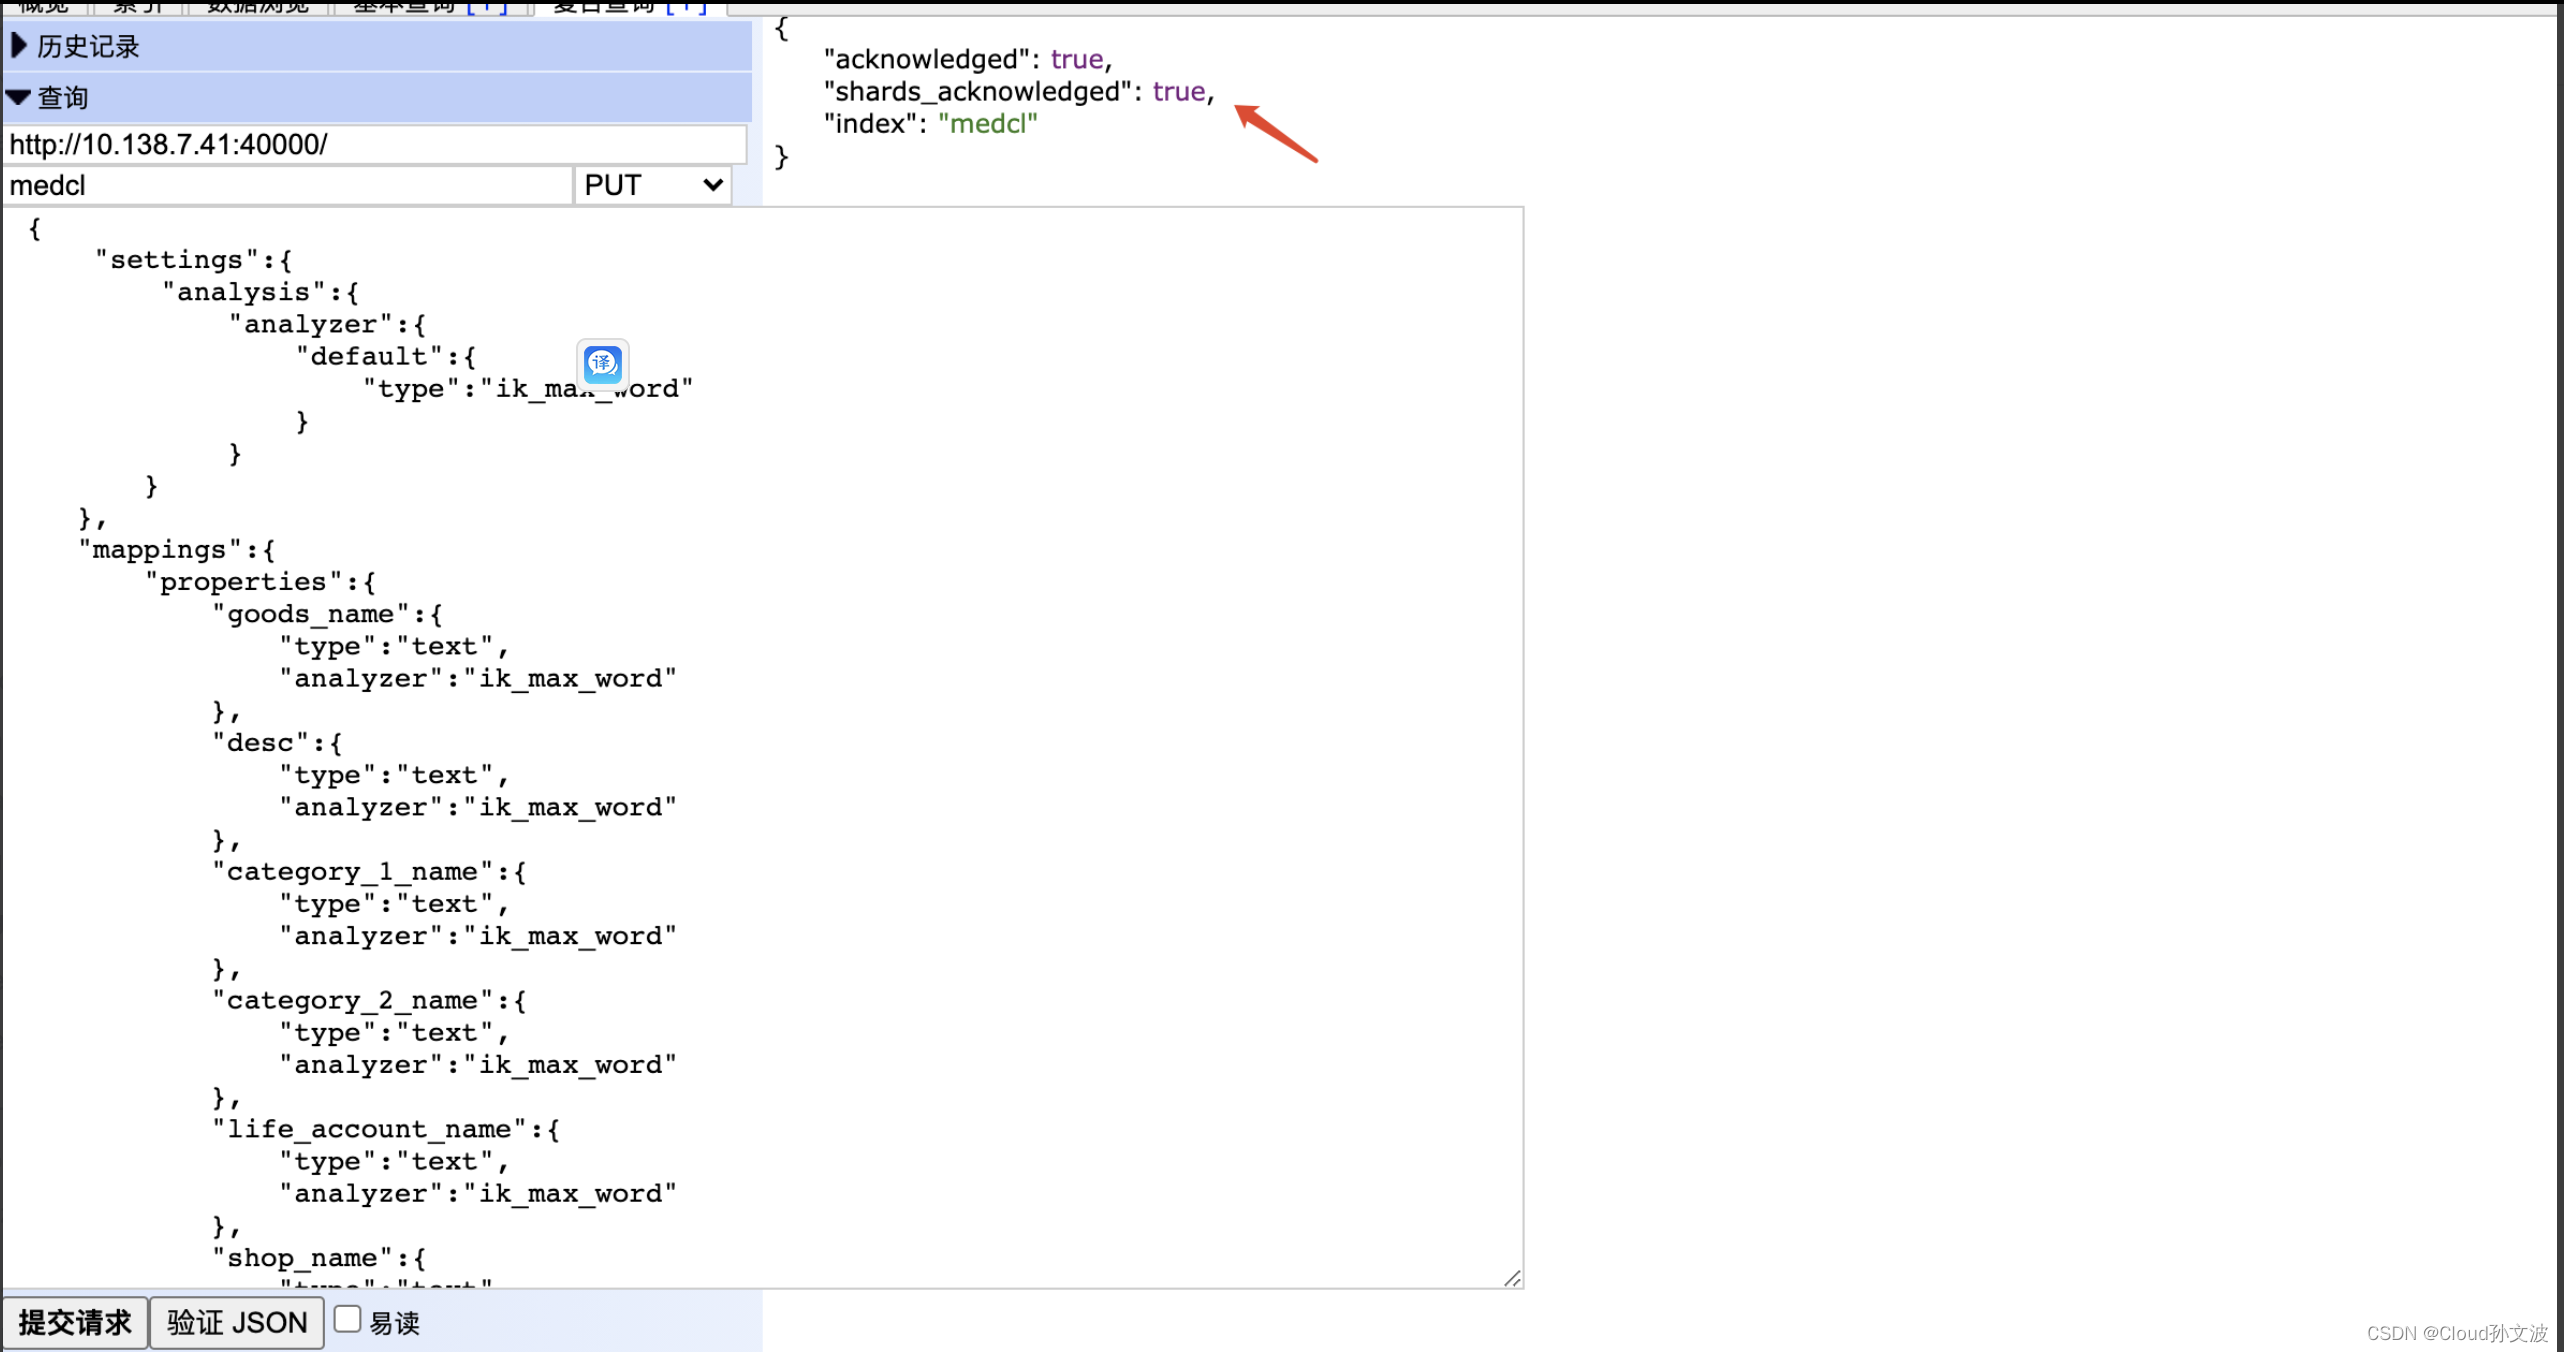
3. 创建一个类型为ik_max_word的索引,shards_acknowledged为true则为正常
查看安装的插件
curl http://localhost:40000/_cat/plugins

查看es集群状态
curl -XGET http://localhost:40000/_cluster/health?pretty

查看节点信息
curl -XGET http://localhost:40000/_cat/nodes?v

查看节点进程信息
curl -XGET http://localhost:40000/_cat/nodes/process?pretty

查看索引信息
curl -XGET http://localhost:40000/_cat/indices?v

查看状态信息
curl -XGET http://localhost:40000/_cluster/health?pretty

删除索引
curl -XDELETE 'localhost:20000/.elastichq/'

创建索引
curl -XPUT 'localhost:20000/test/'

retry重试
curl -X POST localhost:20000/_cluster/reroute?retry_failed=true

查看报错原因
curl -XGET localhost:20000/_cluster/allocation/explain?pretty

找到状态为 red 的索引
curl -X GET "http://localhost:40000/_cat/indices?v="

找到 UNASSIGNED 节点
curl -X GET "http://localhost:40000/_cat/shards"

找到机器id
curl -X GET "http://localhost:40000/_nodes/process?"

ik分词器和pinyin分词器测试命令,针对7.6.1版本
curl 'http://127.0.0.1:20000/_analyze?pretty=true' -H 'Content-Type: application/json' -d '{ "analyzer":"ik_max_word", "text":"我爱你,中国"}'

curl 'http://127.0.0.1:20000/_analyze?pretty=true' -H 'Content-Type: application/json' -d '{ "analyzer":"pinyin", "text":"我爱你,中国"}'

curl 'http://127.0.0.1:20000/_analyze?pretty=true' -H 'Content-Type: application/json' -d '{ "analyzer":"ik_max_word", "text":"好好学习,天天向上"}'

curl 'http://127.0.0.1:20000/_analyze?pretty=true' -H 'Content-Type: application/json' -d '{ "analyzer":"pinyin", "text":"好好学习,天天向上"}'
我想为Heroku构建一个Rails3应用程序。他们使用Postgres作为他们的数据库,所以我通过MacPorts安装了postgres9.0。现在我需要一个postgresgem并且共识是出于性能原因你想要pggem。但是我对我得到的错误感到非常困惑当我尝试在rvm下通过geminstall安装pg时。我已经非常明确地指定了所有postgres目录的位置可以找到但仍然无法完成安装:$envARCHFLAGS='-archx86_64'geminstallpg--\--with-pg-config=/opt/local/var/db/postgresql90/defaultdb/po
我打算为ruby脚本创建一个安装程序,但我希望能够确保机器安装了RVM。有没有一种方法可以完全离线安装RVM并且不引人注目(通过不引人注目,就像创建一个可以做所有事情的脚本而不是要求用户向他们的bash_profile或bashrc添加一些东西)我不是要脚本本身,只是一个关于如何走这条路的快速指针(如果可能的话)。我们还研究了这个很有帮助的问题:RVM-isthereawayforsimpleofflineinstall?但有点误导,因为答案只向我们展示了如何离线在RVM中安装ruby。我们需要能够离线安装RVM本身,并查看脚本https://raw.github.com/wayn
我有一个奇怪的问题:我在rvm上安装了rubyonrails。一切正常,我可以创建项目。但是在我输入“railsnew”时重新启动后,我有“程序'rails'当前未安装。”。SystemUbuntu12.04ruby-v"1.9.3p194"gemlistactionmailer(3.2.5)actionpack(3.2.5)activemodel(3.2.5)activerecord(3.2.5)activeresource(3.2.5)activesupport(3.2.5)arel(3.0.2)builder(3.0.0)bundler(1.1.4)coffee-rails(
我刚刚为fedora安装了emacs。我想用emacs编写ruby。为ruby提供代码提示、代码完成类型功能所需的工具、扩展是什么? 最佳答案 ruby-mode已经包含在Emacs23之后的版本中。不过,它也可以通过ELPA获得。您可能感兴趣的其他一些事情是集成RVM、feature-mode(Cucumber)、rspec-mode、ruby-electric、inf-ruby、rinari(用于Rails)等。这是我当前用于Ruby开发的Emacs配置:https://github.com/citizen428/emacs
我正在尝试在我的centos服务器上安装therubyracer,但遇到了麻烦。$geminstalltherubyracerBuildingnativeextensions.Thiscouldtakeawhile...ERROR:Errorinstallingtherubyracer:ERROR:Failedtobuildgemnativeextension./usr/local/rvm/rubies/ruby-1.9.3-p125/bin/rubyextconf.rbcheckingformain()in-lpthread...yescheckingforv8.h...no***e
我的最终目标是安装当前版本的RubyonRails。我在OSXMountainLion上运行。到目前为止,这是我的过程:已安装的RVM$\curl-Lhttps://get.rvm.io|bash-sstable检查已知(我假设已批准)安装$rvmlistknown我看到当前的稳定版本可用[ruby-]2.0.0[-p247]输入命令安装$rvminstall2.0.0-p247注意:我也试过这些安装命令$rvminstallruby-2.0.0-p247$rvminstallruby=2.0.0-p247我很快就无处可去了。结果:$rvminstall2.0.0-p247Search
我实际上是在尝试使用RVM在我的OSX10.7.5上更新ruby,并在输入以下命令后:rvminstallruby我得到了以下回复:Searchingforbinaryrubies,thismighttakesometime.Checkingrequirementsforosx.Installingrequirementsforosx.Updatingsystem.......Errorrunning'requirements_osx_brew_update_systemruby-2.0.0-p247',pleaseread/Users/username/.rvm/log/138121
由于fast-stemmer的问题,我很难安装我想要的任何rubygem。我把我得到的错误放在下面。Buildingnativeextensions.Thiscouldtakeawhile...ERROR:Errorinstallingfast-stemmer:ERROR:Failedtobuildgemnativeextension./System/Library/Frameworks/Ruby.framework/Versions/2.0/usr/bin/rubyextconf.rbcreatingMakefilemake"DESTDIR="cleanmake"DESTDIR=
我是Google云的新手,我正在尝试对其进行首次部署。我的第一个部署是RubyonRails项目。我基本上是在关注thisguideinthegoogleclouddocumentation.唯一的区别是我使用的是我自己的项目,而不是他们提供的“helloworld”项目。这是我的app.yaml文件runtime:customvm:trueentrypoint:bundleexecrackup-p8080-Eproductionconfig.ruresources:cpu:0.5memory_gb:1.3disk_size_gb:10当我转到我的项目目录并运行gcloudprevie
当我尝试安装Ruby时遇到此错误。我试过查看this和this但无济于事➜~brewinstallrubyWarning:YouareusingOSX10.12.Wedonotprovidesupportforthispre-releaseversion.Youmayencounterbuildfailuresorotherbreakages.Pleasecreatepull-requestsinsteadoffilingissues.==>Installingdependenciesforruby:readline,libyaml,makedepend==>Installingrub