Android : 页面之间的数据传递 intent+bundle
一:Activity之间的传递——从当前页面直接传到跳转 的页面
1:方法:利用Intent和Bundle实现
2:目录:
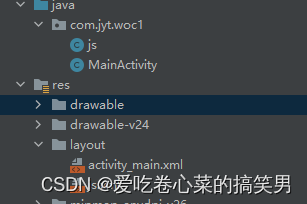
 编辑
编辑
一个activity对应一个xml对应一个界面;
3:MainAcitivity.xml
<?xml version="1.0" encoding="utf-8"?>
<LinearLayout xmlns:android="http://schemas.android.com/apk/res/android"
    xmlns:app="http://schemas.android.com/apk/res-auto"
    xmlns:tools="http://schemas.android.com/tools"
    android:layout_width="match_parent"
    android:layout_height="match_parent"
    tools:context=".MainActivity"
    android:orientation="vertical">

   <EditText
       android:layout_width="match_parent"
       android:layout_height="wrap_content"
       android:id="@+id/et1"
       android:hint="数据填写行1"
       />
    <EditText
        android:layout_width="match_parent"
        android:layout_height="wrap_content"
        android:id="@+id/et2"
        android:hint="数据填写行2"
        />
    <Button
        android:layout_width="wrap_content"
        android:layout_height="wrap_content"
        android:text="传递"
        android:layout_gravity="center"
        android:id="@+id/bt"/>

</LinearLayout>

传递页
js.xml
<?xml version="1.0" encoding="utf-8"?>
<LinearLayout xmlns:android="http://schemas.android.com/apk/res/android"
    xmlns:app="http://schemas.android.com/apk/res-auto"
    xmlns:tools="http://schemas.android.com/tools"
    android:layout_width="match_parent"
    android:layout_height="match_parent"
    tools:context=".MainActivity"
    android:orientation="vertical">

    <TextView
        android:layout_width="wrap_content"
        android:layout_height="wrap_content"
        android:id="@+id/tv1"

        android:layout_gravity="center"
        />

    <TextView
        android:layout_width="wrap_content"
        android:layout_height="wrap_content"
        android:id="@+id/tv2"

        android:layout_gravity="center"
        />

</LinearLayout>

接收页
4:java
MainAcitivity.java
package com.jyt.woc1;

import androidx.appcompat.app.AppCompatActivity;

import android.content.Intent;
import android.os.Bundle;
import android.view.View;
import android.widget.Button;
import android.widget.EditText;

public class MainActivity extends AppCompatActivity {
    EditText et1,et2;
    Button bt;
    @Override
    protected void onCreate(Bundle savedInstanceState) {
        super.onCreate(savedInstanceState);
        setContentView(R.layout.activity_main);

        et1=findViewById(R.id.et1);
        et2=findViewById(R.id.et2);
        bt=findViewById(R.id.bt);

        bt.setOnClickListener(new View.OnClickListener() {
            @Override
            public void onClick(View view) {
                String x,y;
                x=et1.getText().toString();
                y=et2.getText().toString();

                Bundle bundle=new Bundle();//存各种数据
                bundle.putString("1:",x);
                bundle.putString("2:",y);

                Intent woc =new Intent(MainActivity.this,js.class);
                woc.putExtras(bundle);
                startActivity(woc);

            }
        });

    }
}

js.java
package com.jyt.woc1;

import androidx.appcompat.app.AppCompatActivity;

import android.content.Intent;
import android.os.Bundle;
import android.widget.EditText;
import android.widget.TextView;

public class js extends AppCompatActivity {
    TextView tv1,tv2;
    @Override
    protected void onCreate(Bundle savedInstanceState) {
        super.onCreate(savedInstanceState);
        setContentView(R.layout.js);

        tv1=findViewById(R.id.tv1);
        tv2=findViewById(R.id.tv2);

        Intent woc=getIntent();//获取
        Bundle nb=woc.getExtras();//取出数据

        tv1.setText(nb.getString("1:"));//通过key取出
        tv2.setText(nb.getString("2:"));


    }
}
二:Activity之间的传递——回调到上一页
1:结构两个xml对应两个Acitivity
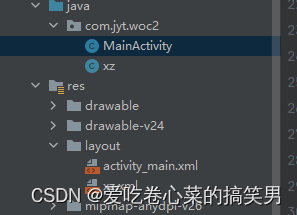
 编辑
编辑
2:xml文件
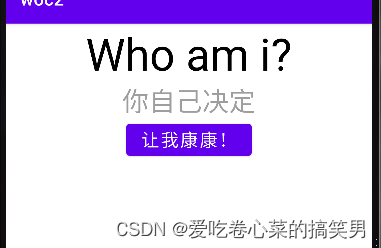
activity_main.xml
<?xml version="1.0" encoding="utf-8"?>
<LinearLayout xmlns:android="http://schemas.android.com/apk/res/android"
    xmlns:app="http://schemas.android.com/apk/res-auto"
    xmlns:tools="http://schemas.android.com/tools"
    android:layout_width="match_parent"
    android:layout_height="match_parent"
    tools:context=".MainActivity"
    android:orientation="vertical">

    <TextView
        android:layout_width="wrap_content"
        android:layout_height="wrap_content"
        android:text="Who am i?"
        android:layout_gravity="center"
        android:textSize="50sp"
        android:textColor="@color/black"

        />
    <TextView
        android:layout_width="wrap_content"
        android:layout_height="wrap_content"
        android:hint="你自己决定"
        android:layout_gravity="center"
        android:textSize="30sp"
        android:id="@+id/et"/>
    <Button
        android:layout_width="wrap_content"
        android:layout_height="wrap_content"
        android:text="让我康康!"

        android:textSize="20sp"
        android:layout_gravity="center"
        android:id="@+id/bt"/>

</LinearLayout>

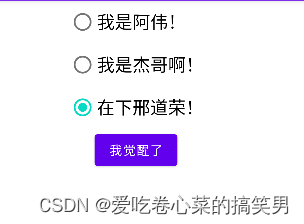
xz.xml
<?xml version="1.0" encoding="utf-8"?>

<LinearLayout xmlns:android="http://schemas.android.com/apk/res/android"

    android:layout_width="match_parent"

    android:layout_height="match_parent"

    android:orientation="vertical">

    <RadioGroup

        android:layout_width="wrap_content"

        android:layout_height="wrap_content"

        android:layout_gravity="center"

        android:id="@+id/rg">

       <RadioButton

           android:layout_width="wrap_content"

           android:layout_height="wrap_content"

           android:text="我是阿伟!"

           android:textSize="20sp"

           android:id="@+id/rb1"

           />


        <RadioButton

            android:layout_width="wrap_content"

            android:layout_height="wrap_content"

            android:text="我是杰哥啊!"

            android:textSize="20sp"

            android:id="@+id/rb2"

            />


        <RadioButton

            android:layout_width="wrap_content"

            android:layout_height="wrap_content"

            android:text="在下邢道荣!"

            android:textSize="20sp"

            android:id="@+id/rb3"

            />

    </RadioGroup>

    <Button

        android:layout_width="wrap_content"

        android:layout_height="wrap_content"

        android:id="@+id/bt1"

        android:layout_gravity="center"

        android:text="我觉醒了"

        />


</LinearLayout>
3:java
MainAcitivity.java
package com.jyt.woc2;
import androidx.appcompat.app.AppCompatActivity;
import android.content.Intent;
import android.os.Bundle;
import android.view.View;
import android.widget.Button;
import android.widget.EditText;
import android.widget.ImageView;
import android.widget.TextView;
import org.w3c.dom.Text;
public class MainActivity extends AppCompatActivity {
private TextView ed;
private Button bt;
@Override
protected void onCreate(Bundle savedInstanceState) {
super.onCreate(savedInstanceState);
setContentView(R.layout.activity_main);
ed=findViewById(R.id.et);
bt=findViewById(R.id.bt);
bt.setOnClickListener(new View.OnClickListener() {
@Override
public void onClick(View view) {
Intent woc=new Intent(MainActivity.this,xz.class);//跳转
startActivityForResult(woc, 1);/* 请求有回调的跳转 */
}
});
}
@Override//对回调的数据做对应的处理很关键!!
protected void onActivityResult(int requestCode, int resultCode, Intent data)
{
super.onActivityResult(requestCode, resultCode, data);
if(requestCode==1 && resultCode==2){ //判断是否为待处理的结果 请求码和回调码一致才行
Bundle bundle=data.getExtras(); //获取传递的数据包
String woc =bundle.getString("woc");
ed.setText(woc);
}
}
}
xz.java
package com.jyt.woc2;


import android.content.Intent;

import android.os.Bundle;

import android.view.View;

import android.widget.Button;

import android.widget.RadioButton;

import android.widget.RadioGroup;


import androidx.appcompat.app.AppCompatActivity;


public class xz extends AppCompatActivity {


    private RadioButton rb1,rb2,rb3;

    private Button bt;

    @Override

    protected void onCreate(Bundle savedInstanceState) {

        super.onCreate(savedInstanceState);

        setContentView(R.layout.xz);


        rb1=findViewById(R.id.rb1);

        rb2=findViewById(R.id.rb2);

        rb3=findViewById(R.id.rb3);


        bt=findViewById(R.id.bt1);


        bt.setOnClickListener(new View.OnClickListener() {

            @Override

            public void onClick(View view) {

                String x;

                if(rb1.isChecked())

                {

                    x=rb1.getText().toString();

                }

                else if(rb2.isChecked())

                {

                    x=rb2.getText().toString();

                }

                else

                {

                    x=rb3.getText().toString();

                }

                Intent intent=new Intent();//创建并实例化一个intent对象

                Bundle bundle = new Bundle();    //实例化要传递的数据包

                bundle.putString("woc",x);// 放入数据

                intent.putExtras(bundle);    //将数据包保存到intent中

                setResult(2, intent);    //设置返回的结果码,并返回调用该Activity的Activity

                finish();        //关闭当前Activity

            }

        });

    }

}
 编辑
编辑
 编辑
编辑

 编辑
编辑
三:Fragment 向Activity 传递数据
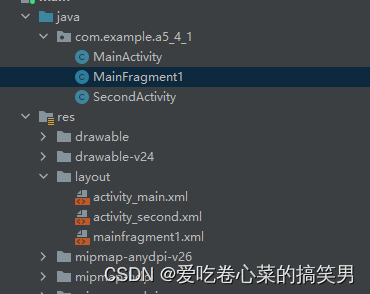
 编辑
编辑
1: activity_main.xml
<LinearLayout xmlns:android="http://schemas.android.com/apk/res/android"

    xmlns:tools="http://schemas.android.com/tools"

    android:layout_width="match_parent"

    android:layout_height="match_parent"

    android:orientation="vertical"

    android:paddingBottom="@dimen/activity_vertical_margin"

    android:paddingLeft="@dimen/activity_horizontal_margin"

    android:paddingRight="@dimen/activity_horizontal_margin"

    android:paddingTop="@dimen/activity_vertical_margin"

    tools:context=".MainActivity" >

  <FrameLayout

        android:id="@+id/fragment_container1"

        android:layout_width="match_parent"

        android:layout_height="500dp"/>

</LinearLayout>
2: MainActivity.java
package com.example.a5_4_1;


import android.app.Activity;

import android.app.Fragment;

import android.app.FragmentManager;

import android.app.FragmentTransaction;

import android.os.Bundle;

public class MainActivity extends Activity {

        FragmentManager fm;

        FragmentTransaction ft,ft1;

        Fragment f1=null;

        protected void onCreate(Bundle savedInstanceState) {

               super.onCreate(savedInstanceState);

               setContentView(R.layout.activity_main);


               fm = getFragmentManager();   // 获取Fragment

               ft = fm.beginTransaction(); // 开启一个事务

               f1 = new MainFragment1();

               ft.add(R.id.fragment_container1, f1);

               ft.commit();


            }


 }

xml中放一个FrameLayout,加载fragment界面
3:mainfragment1.xml
<?xml version="1.0" encoding="utf-8"?>

<LinearLayout xmlns:android="http://schemas.android.com/apk/res/android"

    android:orientation="vertical"

    android:layout_width="match_parent"

    android:layout_height="match_parent"

    >

    <LinearLayout

      android:orientation="horizontal"

      android:layout_width="wrap_content"

      android:layout_height="wrap_content" >

         <TextView

        android:id="@+id/txt1"

        android:text="请输入您的姓名"

        android:textSize="30dp"

        android:layout_width="wrap_content"

        android:layout_height="wrap_content"

        android:background="#FF0000"

        />

       <EditText

        android:id="@+id/edt1"

        android:text=""

        android:textSize="30dp"

        android:layout_width="180dp"

        android:layout_height="wrap_content"

        />

    </LinearLayout>


    <Button

        android:id="@+id/button"

        android:text="点击"

        android:gravity="center"

        android:layout_marginTop="50sp"

        android:layout_marginLeft="120sp"

        android:textSize="30dp"

        android:layout_width="wrap_content"

        android:layout_height="wrap_content"

        android:background="#00FF00"/>

</LinearLayout>
4:mainfragment.java
package com.example.a5_4_1;


import android.app.Fragment;

import android.content.Intent;

import android.os.Bundle;

import android.view.LayoutInflater;

import android.view.View;

import android.view.ViewGroup;

import android.widget.Button;

import android.widget.EditText;

public class MainFragment1 extends Fragment {


            @Override

            public View onCreateView(LayoutInflater inflater, ViewGroup container, Bundle savedInstanceState) {

                View contentView = inflater.inflate(R.layout.mainfragment1, container, false);


                return contentView;

            }

            public void onActivityCreated(Bundle savedInstanceState) {

                super.onActivityCreated(savedInstanceState);

                final EditText edt=(EditText)getActivity().findViewById(R.id.edt1);

                Button button = (Button) getActivity().findViewById(R.id.button);

                button.setOnClickListener(new View.OnClickListener() {

            @Override

            public void onClick(View v) {


                Intent intent = new Intent();

                intent = new Intent(getActivity(), SecondActivity.class);

                       intent.putExtra("data", edt.getText().toString());

                       startActivity(intent);

                        //Toast.makeText(getActivity(), "Clicked", Toast.LENGTH_LONG).show();

                    }

                });


        }

        }
5:
SecondActivity.java
package com.example.a5_4_1;
import android.app.Activity;
import android.content.Intent;
import android.os.Bundle;
import android.widget.TextView;
public class SecondActivity extends Activity {
@Override
protected void onCreate(Bundle savedInstanceState) {
super.onCreate(savedInstanceState);
setContentView(R.layout.activity_second);
TextView text=(TextView)findViewById(R.id.txt1);
Intent intent = getIntent();
String data1 = intent.getStringExtra("data");
text.setText("你的姓名是"+data1);
}
}
6:activity_second.xml
<LinearLayout xmlns:android="http://schemas.android.com/apk/res/android"
xmlns:tools="http://schemas.android.com/tools"
android:layout_width="match_parent"
android:layout_height="match_parent"
android:paddingBottom="@dimen/activity_vertical_margin"
android:paddingLeft="@dimen/activity_horizontal_margin"
android:paddingRight="@dimen/activity_horizontal_margin"
android:paddingTop="@dimen/activity_vertical_margin"
tools:context=".SecondActivity" >
<TextView
android:id="@+id/txt1"
android:layout_width="wrap_content"
android:layout_height="wrap_content"
android:text="" />
</LinearLayout>
这里不难发现,基本原理就和Activity之间的直传差不多,只是在Main下只加载界面而工作全部在加载的界面下完成
我主要使用Ruby来执行此操作,但到目前为止我的攻击计划如下:使用gemsrdf、rdf-rdfa和rdf-microdata或mida来解析给定任何URI的数据。我认为最好映射到像schema.org这样的统一模式,例如使用这个yaml文件,它试图描述数据词汇表和opengraph到schema.org之间的转换:#SchemaXtoschema.orgconversion#data-vocabularyDV:name:namestreet-address:streetAddressregion:addressRegionlocality:addressLocalityphoto:i
我构建了两个需要相互通信和发送文件的Rails应用程序。例如,一个Rails应用程序会发送请求以查看其他应用程序数据库中的表。然后另一个应用程序将呈现该表的json并将其发回。我还希望一个应用程序将存储在其公共(public)目录中的文本文件发送到另一个应用程序的公共(public)目录。我从来没有做过这样的事情,所以我什至不知道从哪里开始。任何帮助,将不胜感激。谢谢! 最佳答案 无论Rails是什么,几乎所有Web应用程序都有您的要求,大多数现代Web应用程序都需要相互通信。但是有一个小小的理解需要你坚持下去,网站不应直接访问彼此
我已经像这样安装了一个新的Rails项目:$railsnewsite它执行并到达:bundleinstall但是当它似乎尝试安装依赖项时我得到了这个错误Gem::Ext::BuildError:ERROR:Failedtobuildgemnativeextension./System/Library/Frameworks/Ruby.framework/Versions/2.0/usr/bin/rubyextconf.rbcheckingforlibkern/OSAtomic.h...yescreatingMakefilemake"DESTDIR="cleanmake"DESTDIR="
在Cooper的书BeginningRuby中,第166页有一个我无法重现的示例。classSongincludeComparableattr_accessor:lengthdef(other)@lengthother.lengthenddefinitialize(song_name,length)@song_name=song_name@length=lengthendenda=Song.new('Rockaroundtheclock',143)b=Song.new('BohemianRhapsody',544)c=Song.new('MinuteWaltz',60)a.betwee
有时我需要处理键/值数据。我不喜欢使用数组,因为它们在大小上没有限制(很容易不小心添加超过2个项目,而且您最终需要稍后验证大小)。此外,0和1的索引变成了魔数(MagicNumber),并且在传达含义方面做得很差(“当我说0时,我的意思是head...”)。散列也不合适,因为可能会不小心添加额外的条目。我写了下面的类来解决这个问题:classPairattr_accessor:head,:taildefinitialize(h,t)@head,@tail=h,tendend它工作得很好并且解决了问题,但我很想知道:Ruby标准库是否已经带有这样一个类? 最佳
我正在检查一个Rails项目。在ERubyHTML模板页面上,我看到了这样几行:我不明白为什么不这样写:在这种情况下,||=和ifnil?有什么区别? 最佳答案 在这种特殊情况下没有区别,但可能是出于习惯。每当我看到nil?被使用时,它几乎总是使用不当。在Ruby中,很少有东西在逻辑上是假的,只有文字false和nil是。这意味着像if(!x.nil?)这样的代码几乎总是更好地表示为if(x)除非期望x可能是文字false。我会将其切换为||=false,因为它具有相同的结果,但这在很大程度上取决于偏好。唯一的缺点是赋值会在每次运行
我没有找到太多关于如何执行此操作的信息,尽管有很多关于如何使用像这样的redirect_to将参数传递给重定向的建议:action=>'something',:controller=>'something'在我的应用程序中,我在路由文件中有以下内容match'profile'=>'User#show'我的表演Action是这样的defshow@user=User.find(params[:user])@title=@user.first_nameend重定向发生在同一个用户Controller中,就像这样defregister@title="Registration"@user=Use
我正在使用RubyonRails3.0.9,我想生成一个传递一些自定义参数的link_toURL。也就是说,有一个articles_path(www.my_web_site_name.com/articles)我想生成如下内容:link_to'Samplelinktitle',...#HereIshouldimplementthecode#=>'http://www.my_web_site_name.com/articles?param1=value1¶m2=value2&...我如何编写link_to语句“alàRubyonRailsWay”以实现该目的?如果我想通过传递一些
我正在尝试使用Curbgem执行以下POST以解析云curl-XPOST\-H"X-Parse-Application-Id:PARSE_APP_ID"\-H"X-Parse-REST-API-Key:PARSE_API_KEY"\-H"Content-Type:image/jpeg"\--data-binary'@myPicture.jpg'\https://api.parse.com/1/files/pic.jpg用这个:curl=Curl::Easy.new("https://api.parse.com/1/files/lion.jpg")curl.multipart_form_
无论您是想搭建桌面端、WEB端或者移动端APP应用,HOOPSPlatform组件都可以为您提供弹性的3D集成架构,同时,由工业领域3D技术专家组成的HOOPS技术团队也能为您提供技术支持服务。如果您的客户期望有一种在多个平台(桌面/WEB/APP,而且某些客户端是“瘦”客户端)快速、方便地将数据接入到3D应用系统的解决方案,并且当访问数据时,在各个平台上的性能和用户体验保持一致,HOOPSPlatform将帮助您完成。利用HOOPSPlatform,您可以开发在任何环境下的3D基础应用架构。HOOPSPlatform可以帮您打造3D创新型产品,HOOPSSDK包含的技术有:快速且准确的CAD