这段时间重大新闻就属ChatGPT了,这到底是个什么呢?官方解释
ChatGPT是美国人工智能研究实验室OpenAI新推出的一种人工智能技术驱动的自然语言处理工具,使用了Transformer神经网络架构,也是GPT-3.5架构,这是一种用于处理序列数据的模型,拥有语言理解和文本生成能力,尤其是它会通过连接大量的语料库来训练模型,这些语料库包含了真实世界中的对话,使得ChatGPT具备上知天文下知地理,还能根据聊天的上下文进行互动的能力,做到与真正人类几乎无异的聊天场景进行交流。ChatGPT不单是聊天机器人,还能进行撰写邮件、视频脚本、文案、翻译、代码等任务。
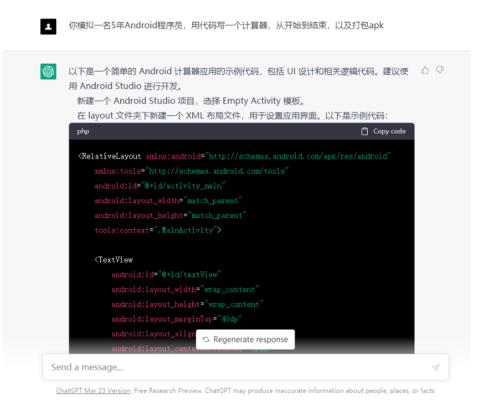
以下是一个简单的 Android 计算器应用的示例代码,包括 UI 设计和相关逻辑代码。建议使用 Android Studio 进行开发。
phpCopy code<RelativeLayout xmlns:android="http://schemas.android.com/apk/res/android"
xmlns:tools="http://schemas.android.com/tools"
android:id="@+id/activity_main"
android:layout_width="match_parent"
android:layout_height="match_parent"
tools:context=".MainActivity">
<TextView
android:id="@+id/textView"
android:layout_width="wrap_content"
android:layout_height="wrap_content"
android:layout_marginTop="40dp"
android:layout_alignParentTop="true"
android:layout_centerHorizontal="true"
android:textSize="40sp"
android:text="0"/>
<Button
android:id="@+id/btn1"
android:layout_width="wrap_content"
android:layout_height="wrap_content"
android:layout_below="@+id/textView"
android:layout_marginTop="10dp"
android:layout_marginLeft="10dp"
android:textSize="20sp"
android:text="1"/>
<Button
android:id="@+id/btn2"
android:layout_width="wrap_content"
android:layout_height="wrap_content"
android:layout_below="@+id/textView"
android:layout_marginTop="10dp"
android:layout_marginLeft="10dp"
android:layout_toRightOf="@+id/btn1"
android:textSize="20sp"
android:text="2"/>
<Button
android:id="@+id/btn3"
android:layout_width="wrap_content"
android:layout_height="wrap_content"
android:layout_below="@+id/textView"
android:layout_marginTop="10dp"
android:layout_marginLeft="10dp"
android:layout_toRightOf="@+id/btn2"
android:textSize="20sp"
android:text="3"/>
<Button
android:id="@+id/btn4"
android:layout_width="wrap_content"
android:layout_height="wrap_content"
android:layout_below="@+id/btn1"
android:layout_marginTop="10dp"
android:layout_marginLeft="10dp"
android:textSize="20sp"
android:text="4"/>
<Button
android:id="@+id/btn5"
android:layout_width="wrap_content"
android:layout_height="wrap_content"
android:layout_below="@+id/btn2"
android:layout_marginTop="10dp"
android:layout_marginLeft="10dp"
android:layout_toRightOf="@+id/btn4"
android:textSize="20sp"
android:text="5"/>
<Button
android:id="@+id/btn6"
android:layout_width="wrap_content"
android:layout_height="wrap_content"
android:layout_below="@+id/btn3"
android:layout_marginTop="10dp"
android:layout_marginLeft="10dp"
android:layout_toRightOf="@+id/btn5"
android:textSize="20sp"
android:text="6"/>
<Button
android:id="@+id/btn7"
android:android:layout_width="wrap_content" android:layout_height="wrap_content" android:layout_below="@+id/btn4" android:layout_marginTop="10dp" android:layout_marginLeft="10dp" android:textSize="20sp" android:text="7"/>
mathematicaCopy code<Button
android:id="@+id/btn8"
android:layout_width="wrap_content"
android:layout_height="wrap_content"
android:layout_below="@+id/btn5"
android:layout_marginTop="10dp"
android:layout_marginLeft="10dp"
android:layout_toRightOf="@+id/btn7"
android:textSize="20sp"
android:text="8"/>
<Button
android:id="@+id/btn9"
android:layout_width="wrap_content"
android:layout_height="wrap_content"
android:layout_below="@+id/btn6"
android:layout_marginTop="10dp"
android:layout_marginLeft="10dp"
android:layout_toRightOf="@+id/btn8"
android:textSize="20sp"
android:text="9"/>
<Button
android:id="@+id/btn0"
android:layout_width="wrap_content"
android:layout_height="wrap_content"
android:layout_below="@+id/btn7"
android:layout_marginTop="10dp"
android:layout_marginLeft="10dp"
android:textSize="20sp"
android:text="0"/>
<Button
android:id="@+id/btnClear"
android:layout_width="wrap_content"
android:layout_height="wrap_content"
android:layout_below="@+id/textView"
android:layout_marginTop="10dp"
android:layout_marginLeft="10dp"
android:layout_toRightOf="@+id/btn3"
android:textSize="20sp"
android:text="C"/>
<Button
android:id="@+id/btnPlus"
android:layout_width="wrap_content"
android:layout_height="wrap_content"
android:layout_below="@+id/btn4"
android:layout_marginTop="10dp"
android:layout_marginLeft="10dp"
android:layout_toRightOf="@+id/btn9"
android:textSize="20sp"
android:text="+"/>
<Button
android:id="@+id/btnMinus"
android:layout_width="wrap_content"
android:layout_height="wrap_content"
android:layout_below="@+id/btn5"
android:layout_marginTop="10dp"
android:layout_marginLeft="10dp"
android:layout_toRightOf="@+id/btnPlus"
android:textSize="20sp"
android:text="-"/>
<Button
android:id="@+id/btnMultiply"
android:layout_width="wrap_content"
android:layout_height="wrap_content"
android:layout_below="@+id/btn6"
android:layout_marginTop="10dp"
android:layout_marginLeft="10dp"
android:layout_toRightOf="@+id/btnMinus"
android:textSize="20sp"
android:text="*"/>
<Button
android:id="@+id/btnDivide"
android:layout_width="wrap_content"
android:layout_height="wrap_content"
android:layout_below="@+id/btn7"
android:layout_marginTop="10dp"
android:layout_marginLeft="10dp"
android:layout_toRightOf="@+id/btn
</LinearLayout>
计算器的主要逻辑实现在MainActivity.java文件中。下面是代码实现:
javaCopy codepublic class MainActivity extends AppCompatActivity {
private TextView textView;
private Button btn0, btn1, btn2, btn3, btn4, btn5, btn6, btn7, btn8, btn9;
private Button btnPlus, btnMinus, btnMultiply, btnDivide, btnClear;
private double num1 = 0, num2 = 0;
private String operator = "";
@Override
protected void onCreate(Bundle savedInstanceState) {
super.onCreate(savedInstanceState);
setContentView(R.layout.activity_main);
textView = findViewById(R.id.textView);
btn0 = findViewById(R.id.btn0);
btn1 = findViewById(R.id.btn1);
btn2 = findViewById(R.id.btn2);
btn3 = findViewById(R.id.btn3);
btn4 = findViewById(R.id.btn4);
btn5 = findViewById(R.id.btn5);
btn6 = findViewById(R.id.btn6);
btn7 = findViewById(R.id.btn7);
btn8 = findViewById(R.id.btn8);
btn9 = findViewById(R.id.btn9);
btnPlus = findViewById(R.id.btnPlus);
btnMinus = findViewById(R.id.btnMinus);
btnMultiply = findViewById(R.id.btnMultiply);
btnDivide = findViewById(R.id.btnDivide);
btnClear = findViewById(R.id.btnClear);
// 设置数字按钮的点击事件
View.OnClickListener numberClickListener = new View.OnClickListener() {
@Override
public void onClick(View v) {
Button button = (Button) v;
textView.append(button.getText());
}
};
btn0.setOnClickListener(numberClickListener);
btn1.setOnClickListener(numberClickListener);
btn2.setOnClickListener(numberClickListener);
btn3.setOnClickListener(numberClickListener);
btn4.setOnClickListener(numberClickListener);
btn5.setOnClickListener(numberClickListener);
btn6.setOnClickListener(numberClickListener);
btn7.setOnClickListener(numberClickListener);
btn8.setOnClickListener(numberClickListener);
btn9.setOnClickListener(numberClickListener);
// 设置运算符按钮的点击事件
View.OnClickListener operatorClickListener = new View.OnClickListener() {
@Override
public void onClick(View v) {
Button button = (Button) v;
if (!TextUtils.isEmpty(textView.getText().toString())) {
num1 = Double.parseDouble(textView.getText().toString());
}
operator = button.getText().toString();
textView.setText("");
}
};
btnPlus.setOnClickListener(operatorClickListener);
btnMinus.setOnClickListener(operatorClickListener);
btnMultiply.setOnClickListener(operatorClickListener);
btnDivide.setOnClickListener(operatorClickListener);
// 设置清除按钮的点击事件
btnClear.setOnClickListener(new View.OnClickListener() {
@Override
public void onClick(View v) {
num1 = 0;
num2 = 0;
operator = "";
textView.setText("");
}
});
// 设置等于按钮的点击事件
findViewById(R.id.btnEquals).setOnClickListener(new View.OnClickListener() {
@Override
public void onClick(View v) {
if (!TextUtils.isEmpty(textView.getText().toString())) {
num2 = Double.parseDouble(textView.getText().toString());
}
double result = 0;
switch (operator) {
case "+":
result = num1 + num2;
break;
case "-":
result = num1 - num2;
break;
case "*":
result = num1 * num2;
break;
case "/":
result = num1 / num2;
break;
}
textView.setText(String.valueOf(result));
num1 = result;
num2 = 0;
operator = "";
}
});
}
}
最后一步是打包APK文件。要打包APK文件,我们需要进行以下步骤:
第一步是生成签名密钥。签名密钥是为了确保APK文件的完整性和安全性,它用于验证APK文件是否被篡改过。我们可以使用以下命令生成签名密钥:
keytool -genkey -v -keystore myapp.keystore -alias myapp -keyalg RSA -keysize 2048 -validity 10000
这条命令将生成一个名为myapp.keystore的签名密钥文件。在生成签名密钥时,我们需要设置别名、密码和有效期等信息。
第二步是配置build.gradle文件。我们需要在build.gradle文件中配置签名密钥信息和其他构建选项。以下是一个示例build.gradle文件的内容:
javaCopy codeandroid {
compileSdkVersion 30
buildToolsVersion "30.0.2"
defaultConfig {
applicationId "com.example.calculator"
minSdkVersion 21
targetSdkVersion 30
versionCode 1
versionName "1.0"
}
signingConfigs {
release {
storeFile file("myapp.keystore")
storePassword "mystorepass"
keyAlias "myapp"
keyPassword "mykeypass"
}
}
buildTypes {
release {
minifyEnabled false
proguardFiles getDefaultProguardFile('proguard-android-optimize.txt'), 'proguard-rules.pro'
signingConfig signingConfigs.release
}
}
}
dependencies {
implementation 'androidx.appcompat:appcompat:1.2.0'
}
在这个build.gradle文件中,我们定义了应用程序的一些基本属性,例如应用程序ID、最小SDK版本和目标SDK版本等。我们还定义了签名密钥的信息和构建类型(例如debug或release)等。
第三步是执行构建任务,生成APK文件。我们可以使用以下命令执行构建任务:
./gradlew assembleRelease
这个命令将会执行一个名为assembleRelease的Gradle任务,这个任务将会生成一个名为app-release.apk的APK文件。这个APK文件就是我们要发布的应用程序文件。
以上是Android计算器的代码实现和APK打包流程。如果您按照上述步骤实现了一个计算器应用程序并成功打包了APK文件,那么恭喜您,您已经掌握了基本的Android开发技能!
最后,我们还需要对生成的APK文件进行签名,以确保APK文件在用户设备上运行时可以被认可和信任。
要对APK文件进行签名,我们可以使用以下命令:
jarsigner -verbose -sigalg SHA1withRSA -digestalg SHA1 -keystore myapp.keystore app-release-unsigned.apk myapp
这个命令将使用myapp.keystore签名密钥文件对app-release-unsigned.apk文件进行签名,签名后的APK文件将会被命名为app-release.apk。在签名过程中,我们需要输入签名密钥的密码。
现在,我们已经成功生成了一个已经签名的APK文件,可以将其上传到Google Play或其他应用商店上进行发布。不过,在发布之前,我们还需要进行一些测试和优化,以确保应用程序的质量和性能。

总的来说,编写一个Android应用程序并将其打包成APK文件需要多个步骤,包括创建项目、编写代码、布局界面、调试、构建和打包。这些步骤可能会涉及到多个工具和技术,例如Android Studio、Gradle、XML、Java、布局文件、调试工具等。学习和掌握这些技能需要时间和精力,但是一旦掌握了这些技能,您就可以开发出高质量、优秀的Android应用程序,为用户带来更好的体验和价值。
答案:否
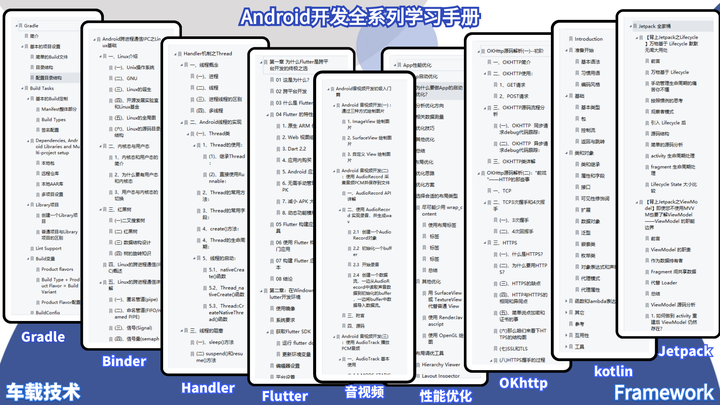
往下看,就明白了。ai不可能代替程序员岗位只能做到辅助的程度,这里程序员还是要加速进阶自己的技术,这里推荐一份Android程序员的核心笔记《Android核心技术手册》点击参考获取想领取的技术类目。
当前AI技术已经在一定程度上可以辅助编写Android程序代码,但是完全由AI来编写整个应用程序还不太可行。虽然现在已经有一些AI代码生成工具,如OpenAI的Codex和GitHub的Copilot,它们可以通过学习大量的代码库和算法模型来辅助开发人员编写代码,但是它们的能力还远远不足以取代人类程序员。
这是因为,AI的代码生成能力还有很多限制和缺陷,例如AI只能根据已有的模式和规则来生成代码,无法进行创造性的思考和判断,无法理解复杂的业务逻辑和用户需求,无法保证生成的代码的质量和可维护性等。此外,由于AI的代码生成过程是基于已有的代码库和算法模型,所以它们也容易受到数据偏差和隐私泄露等问题的影响。
因此,虽然AI技术在某些方面可以辅助编写Android程序代码,但是在目前的技术水平下,它还不能完全取代人类程序员。程序员仍然需要具备一定的编程技能和经验,才能够开发出高质量的Android应用程序。
如何在buildr项目中使用Ruby?我在很多不同的项目中使用过Ruby、JRuby、Java和Clojure。我目前正在使用我的标准Ruby开发一个模拟应用程序,我想尝试使用Clojure后端(我确实喜欢功能代码)以及JRubygui和测试套件。我还可以看到在未来的不同项目中使用Scala作为后端。我想我要为我的项目尝试一下buildr(http://buildr.apache.org/),但我注意到buildr似乎没有设置为在项目中使用JRuby代码本身!这看起来有点傻,因为该工具旨在统一通用的JVM语言并且是在ruby中构建的。除了将输出的jar包含在一个独特的、仅限ruby
使用带有Rails插件的vim,您可以创建一个迁移文件,然后一次性打开该文件吗?textmate也可以这样吗? 最佳答案 你可以使用rails.vim然后做类似的事情::Rgeneratemigratonadd_foo_to_bar插件将打开迁移生成的文件,这正是您想要的。我不能代表textmate。 关于ruby-使用VimRails,您可以创建一个新的迁移文件并一次性打开它吗?,我们在StackOverflow上找到一个类似的问题: https://sta
在rails源中:https://github.com/rails/rails/blob/master/activesupport/lib/active_support/lazy_load_hooks.rb可以看到以下内容@load_hooks=Hash.new{|h,k|h[k]=[]}在IRB中,它只是初始化一个空哈希。和做有什么区别@load_hooks=Hash.new 最佳答案 查看rubydocumentationforHashnew→new_hashclicktotogglesourcenew(obj)→new_has
我需要从一个View访问多个模型。以前,我的links_controller仅用于提供以不同方式排序的链接资源。现在我想包括一个部分(我假设)显示按分数排序的顶级用户(@users=User.all.sort_by(&:score))我知道我可以将此代码插入每个链接操作并从View访问它,但这似乎不是“ruby方式”,我将需要在不久的将来访问更多模型。这可能会变得很脏,是否有针对这种情况的任何技术?注意事项:我认为我的应用程序正朝着单一格式和动态页面内容的方向发展,本质上是一个典型的网络应用程序。我知道before_filter但考虑到我希望应用程序进入的方向,这似乎很麻烦。最终从任何
我想要做的是有2个不同的Controller,client和test_client。客户端Controller已经构建,我想创建一个test_clientController,我可以使用它来玩弄客户端的UI并根据需要进行调整。我主要是想绕过我在客户端中内置的验证及其对加载数据的管理Controller的依赖。所以我希望test_clientController加载示例数据集,然后呈现客户端Controller的索引View,以便我可以调整客户端UI。就是这样。我在test_clients索引方法中试过这个:classTestClientdefindexrender:template=>
如果您尝试在Ruby中的nil对象上调用方法,则会出现NoMethodError异常并显示消息:"undefinedmethod‘...’fornil:NilClass"然而,有一个tryRails中的方法,如果它被发送到一个nil对象,它只返回nil:require'rubygems'require'active_support/all'nil.try(:nonexisting_method)#noNoMethodErrorexceptionanymore那么try如何在内部工作以防止该异常? 最佳答案 像Ruby中的所有其他对象
关闭。这个问题需要detailsorclarity.它目前不接受答案。想改进这个问题吗?通过editingthispost添加细节并澄清问题.关闭8年前。Improvethisquestion为什么SecureRandom.uuid创建一个唯一的字符串?SecureRandom.uuid#=>"35cb4e30-54e1-49f9-b5ce-4134799eb2c0"SecureRandom.uuid方法创建的字符串从不重复?
我有一个正在构建的应用程序,我需要一个模型来创建另一个模型的实例。我希望每辆车都有4个轮胎。汽车模型classCar轮胎模型classTire但是,在make_tires内部有一个错误,如果我为Tire尝试它,则没有用于创建或新建的activerecord方法。当我检查轮胎时,它没有这些方法。我该如何补救?错误是这样的:未定义的方法'create'forActiveRecord::AttributeMethods::Serialization::Tire::Module我测试了两个环境:测试和开发,它们都因相同的错误而失败。 最佳答案
我的主要目标是能够完全理解我正在使用的库/gem。我尝试在Github上从头到尾阅读源代码,但这真的很难。我认为更有趣、更温和的踏脚石就是在使用时阅读每个库/gem方法的源代码。例如,我想知道RubyonRails中的redirect_to方法是如何工作的:如何查找redirect_to方法的源代码?我知道在pry中我可以执行类似show-methodmethod的操作,但我如何才能对Rails框架中的方法执行此操作?您对我如何更好地理解Gem及其API有什么建议吗?仅仅阅读源代码似乎真的很难,尤其是对于框架。谢谢! 最佳答案 Ru
我的假设是moduleAmoduleBendend和moduleA::Bend是一样的。我能够从thisblog找到解决方案,thisSOthread和andthisSOthread.为什么以及什么时候应该更喜欢紧凑语法A::B而不是另一个,因为它显然有一个缺点?我有一种直觉,它可能与性能有关,因为在更多命名空间中查找常量需要更多计算。但是我无法通过对普通类进行基准测试来验证这一点。 最佳答案 这两种写作方法经常被混淆。首先要说的是,据我所知,没有可衡量的性能差异。(在下面的书面示例中不断查找)最明显的区别,可能也是最著名的,是你的